Connect Your WebWhiz Chatbot with Slack for Enhanced Productivity
Are you looking to make your team's workflow more efficient? One way to do this is by integrating your Webwhiz chatbot into your Slack workspace. This allows your team to interact with your custom chatbot without ever leaving Slack, making information access quick and effortless. Here's a step-by-step guide on how to set up this integration.
Adding WebWhiz Chatbot to your Slack workspace
- Have an active WebWhiz account.
- Select the chatbot you wish to connect with Slack and navigate to the ‘Integrations’ section.
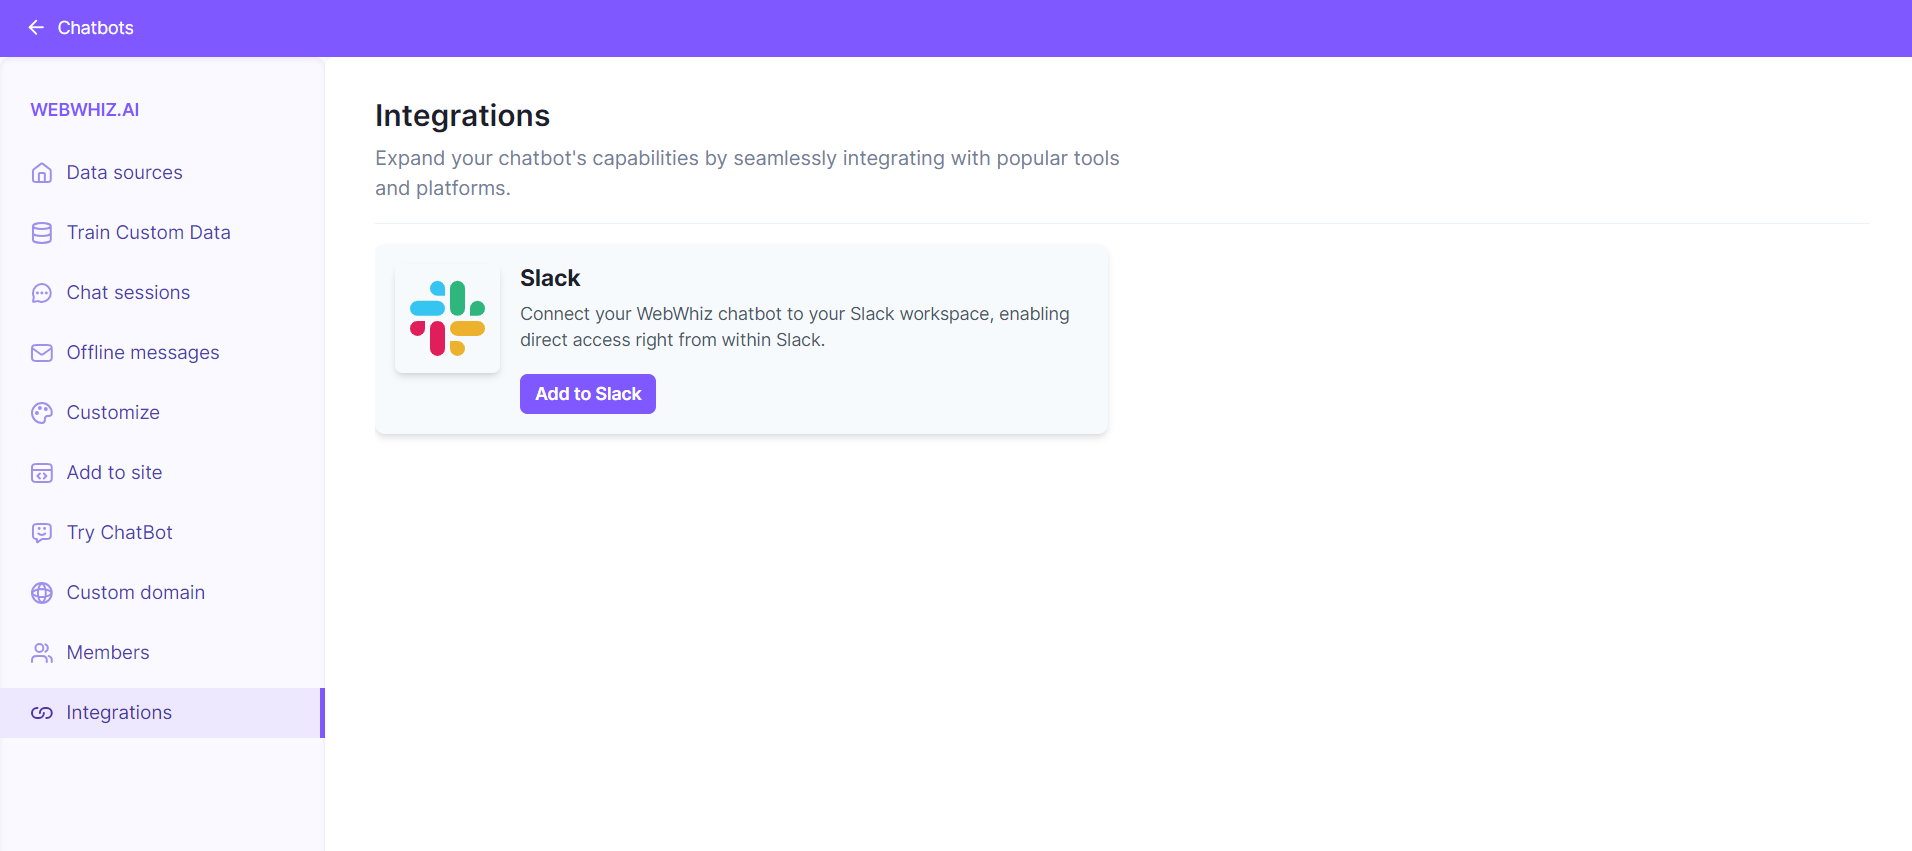
- Find Slack and click on the ‘Add to Slack’ button.
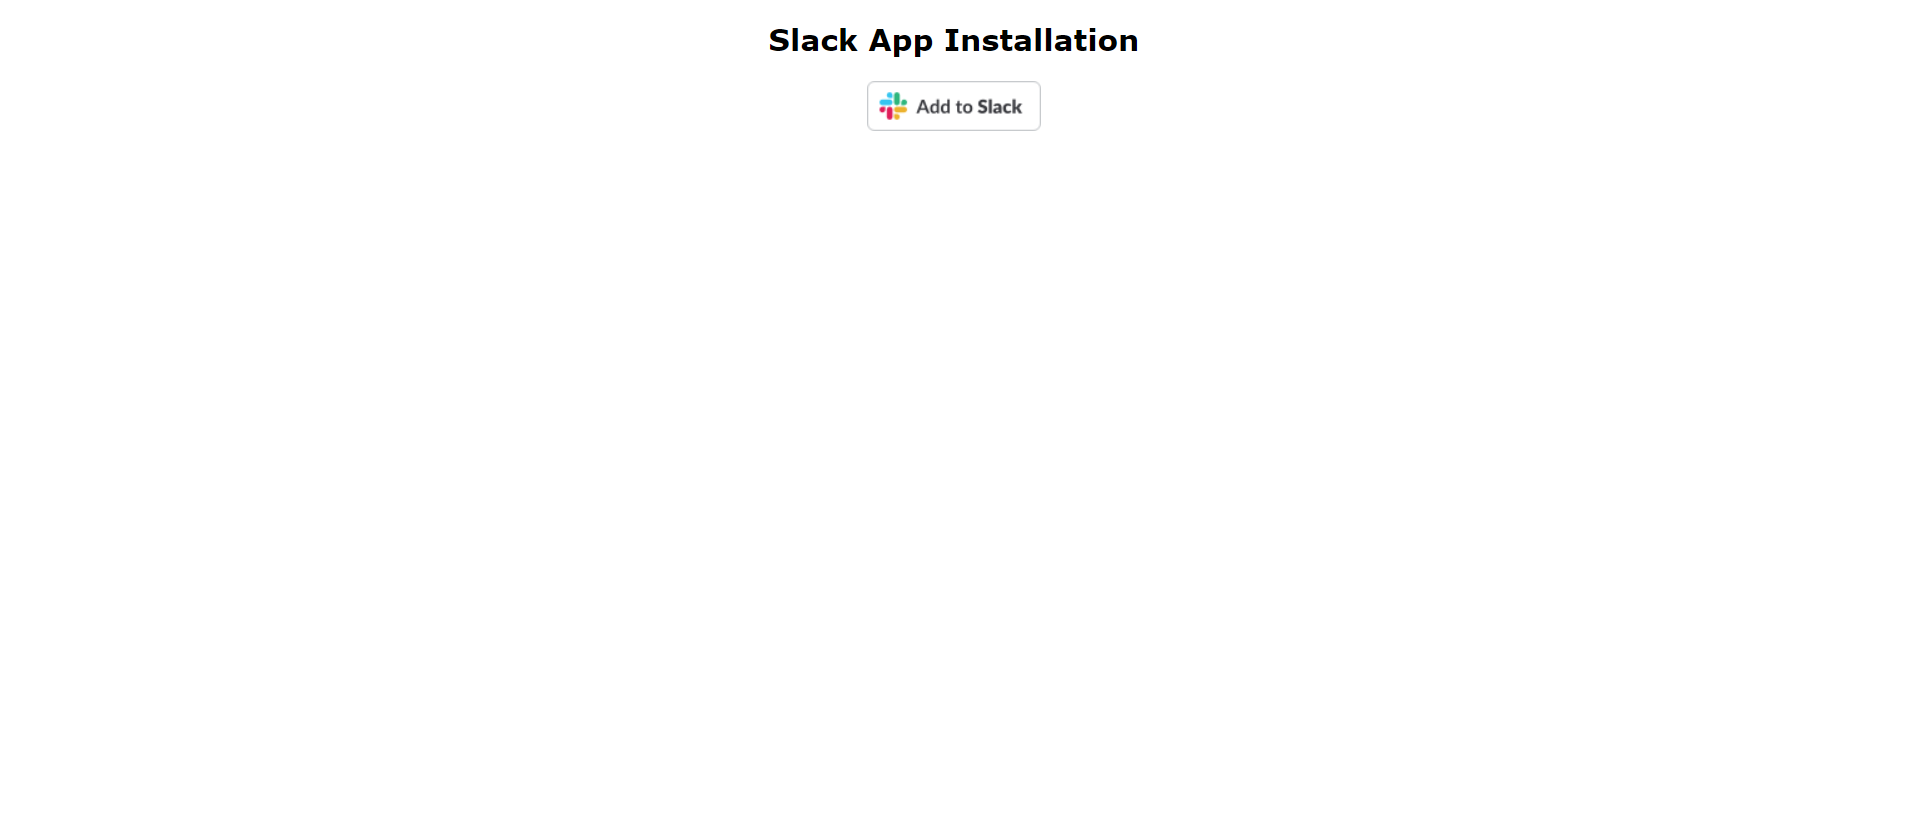
- You will be redirected to a new page. Click on the ‘Add to Slack’ button again.
- On the next page, choose the Slack workspace you want to add the chatbot to by selecting it from the dropdown menu in the top right corner.
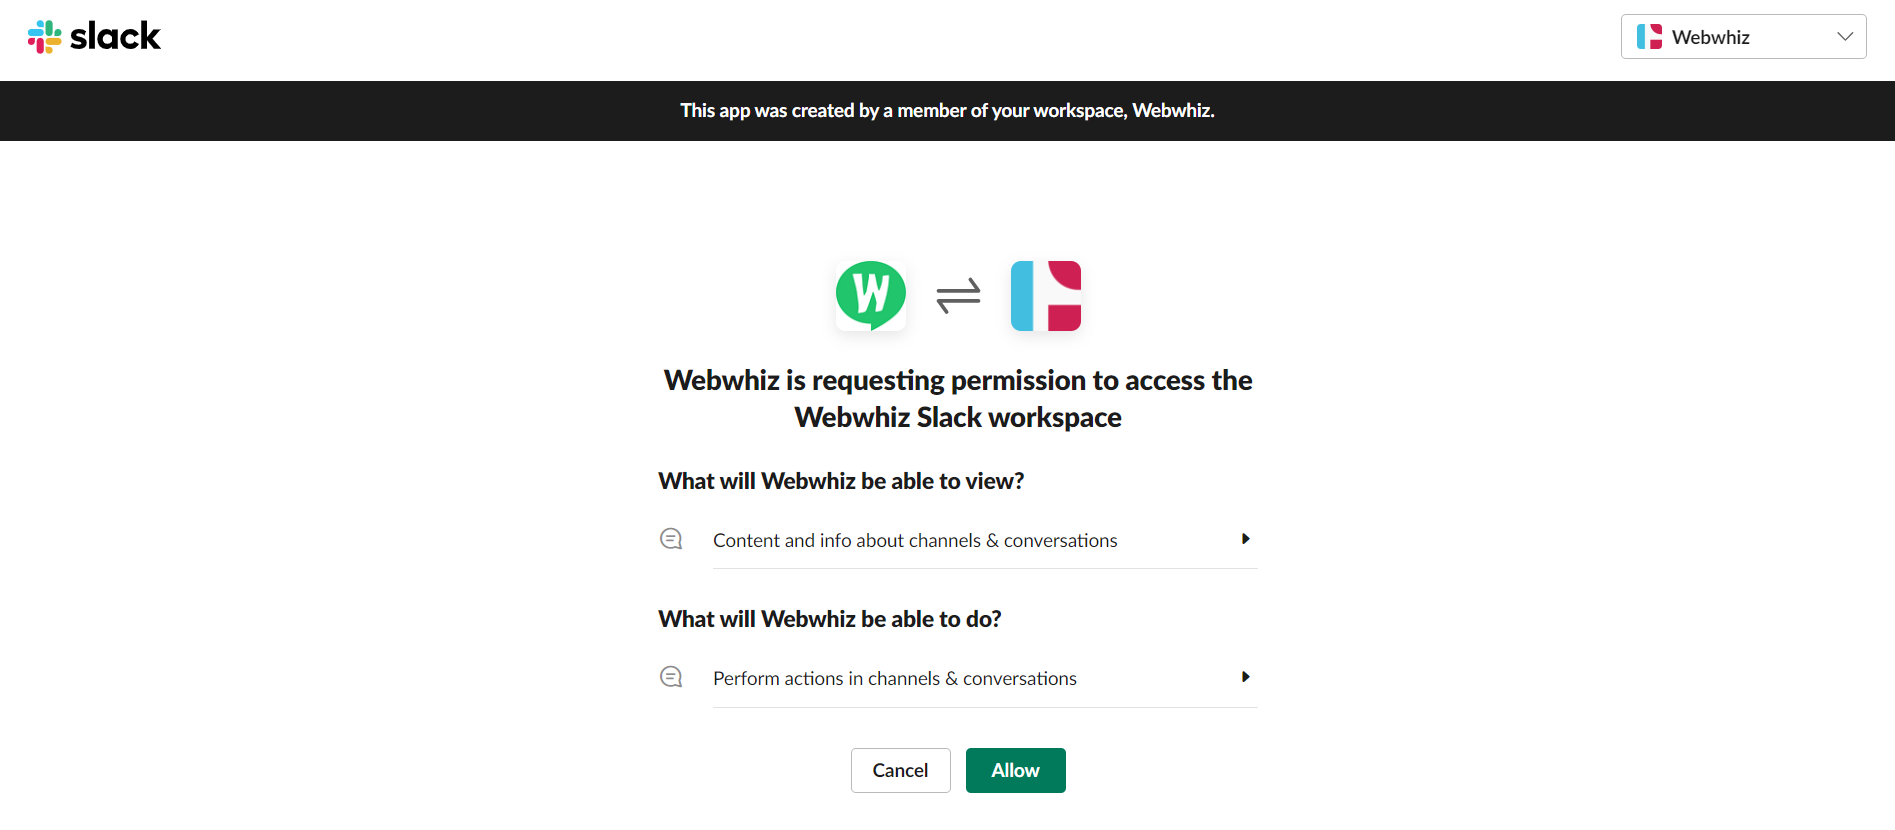
- After selecting the workspace, click on the ‘Allow’ button to grant WebWhiz the necessary permissions to access your workspace.
- Upon successful integration, you will be redirected to your Slack workspace.
Accessing Webwhiz Chatbot from your Slack workspace
After successfully integrating WebWhiz with your Slack workspace, you can interact with your chatbot in two primary ways: by directly messaging the bot or by adding the bot to one of your channels. Here's how you can do both:
Direct Messaging the Webwhiz bot
- In your Slack workspace, navigate to the ‘Home’ tab and locate the ‘Apps’ section in the sidebar.
- Find your WebWhiz bot in the ‘Apps’ list and click on the bot to open the direct messaging window.
- Begin the conversation by typing your message or command.
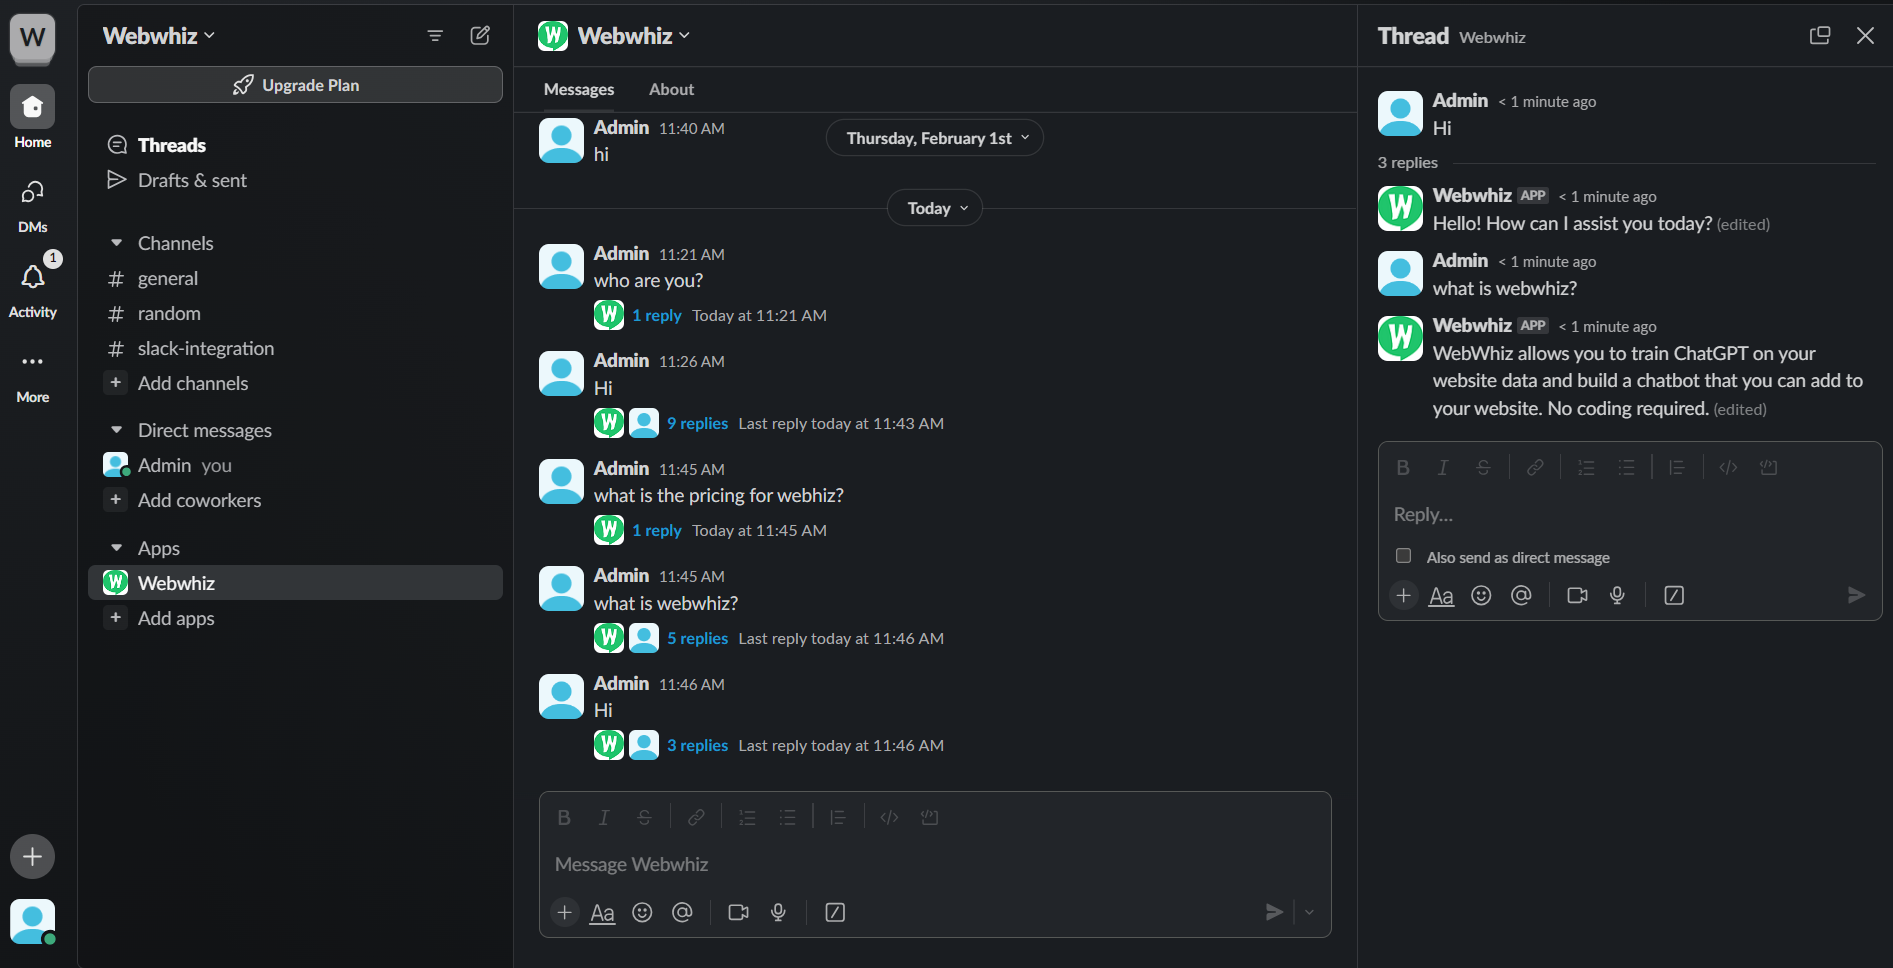
- When you send a message to the WebWhiz bot, it will reply in the same thread, maintaining the context of the conversation. If you have follow-up questions or messages, continue the conversation within this thread. This approach keeps the dialogue organized and contextually relevant, enabling the WebWhiz to provide more accurate responses.
Adding the Webwhiz Bot to a Channel
- Navigate to the channel you want to add your WebWhiz bot to.
- Click on the channel name at the top to open the channel details, Look for the ‘Integrations’ section and select ‘Add an app’.
- Search for your WebWhiz bot in the list and select ‘Add’ to include it in the channel.
- Once added, you can mention the bot by typing @Webwhiz followed by your message to interact with it within the channel.
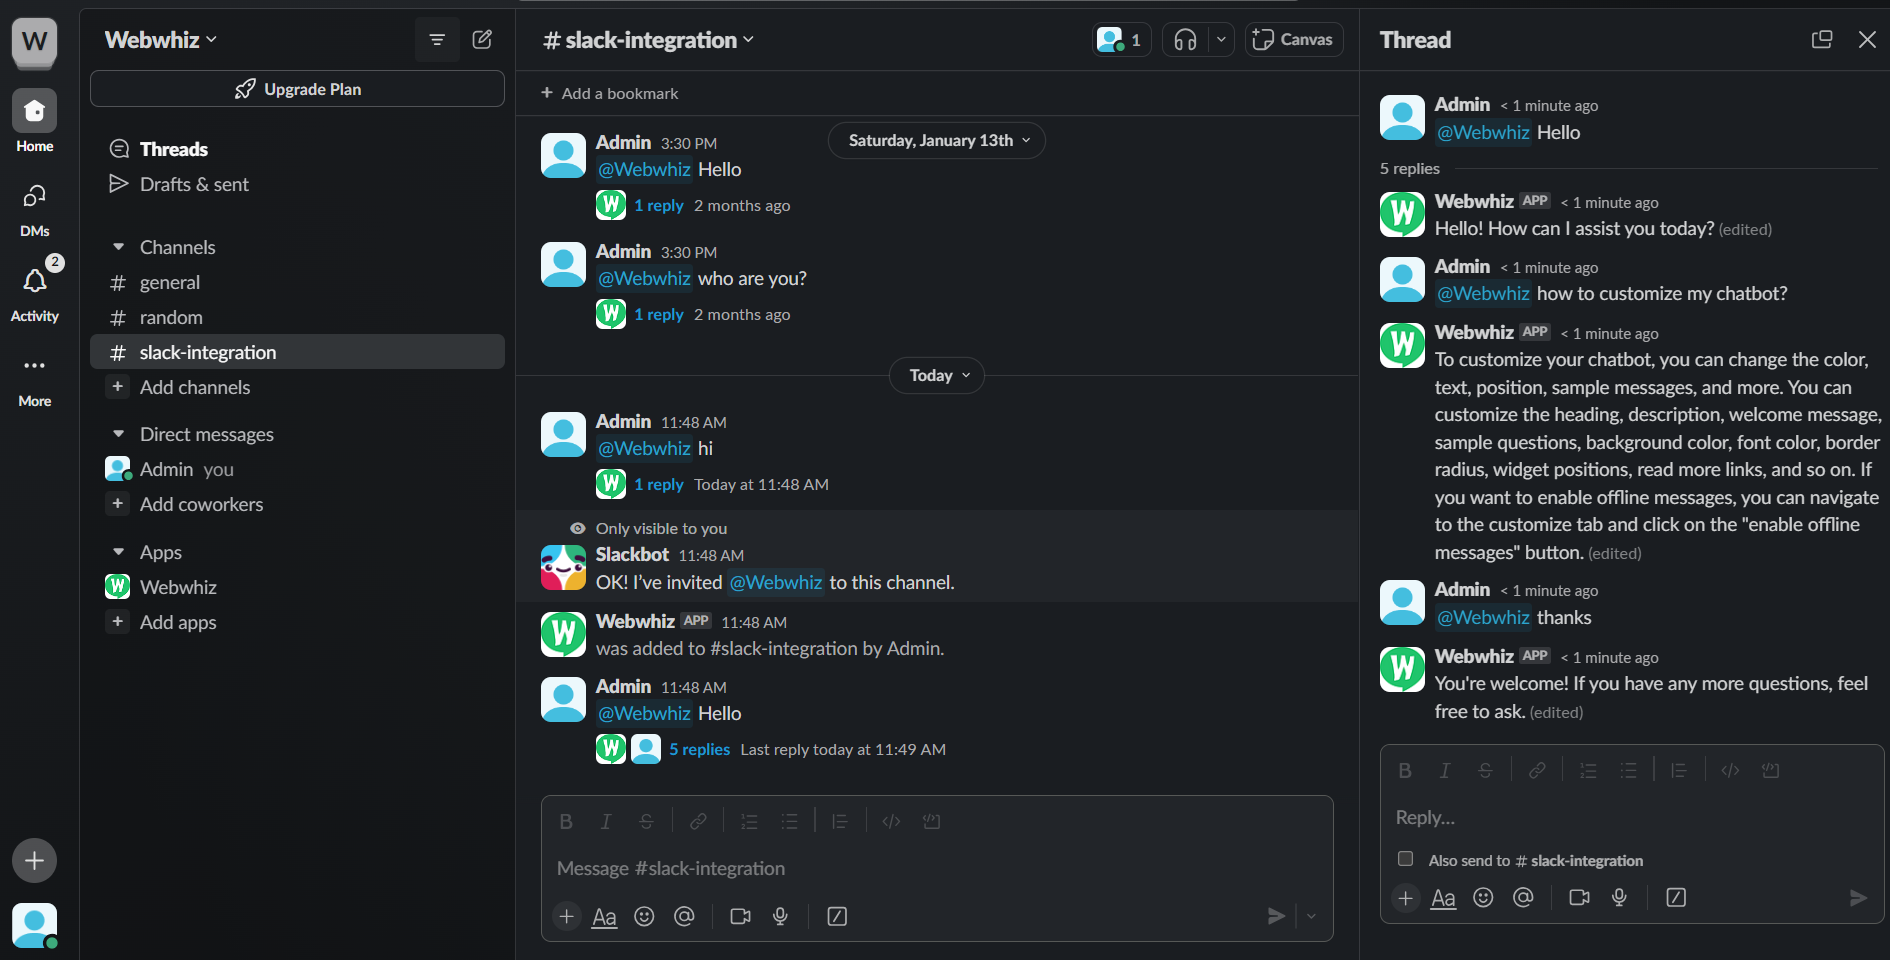
- For follow-up questions or messages, ensure to mention the bot (@Webwhiz) with each message to keep the conversation flowing within the same thread. This ensures the bot recognizes and responds to each query accurately within the channel context.
Note on Accessing Multiple Chatbots:
Currently, through the WebWhiz Slack integration, users can access only one chatbot at a time within their Slack workspace. If you wish to switch to a different chatbot, you can easily do so by following these steps:
- Log in to your WebWhiz account and navigate to the dashboard of the new chatbot you wish to integrate with Slack.
- Go to the ‘Integrations’ section of this new chatbot.
- Follow the integration process to connect it with Slack, just as you did with the previous chatbot.
Completing this process will replace the current chatbot integrated with your Slack workspace with the new one. This allows you to seamlessly switch between different WebWhiz chatbots according to your needs or projects.
Remember, only one WebWhiz chatbot can be active in your Slack workspace at a time. To switch back, simply repeat the integration process with your desired chatbot.
Removing the WebWhiz Chatbot from Your Slack Workspace
If you decide that you no longer need the WebWhiz Chatbot in your Slack workspace, you can remove it by following these simple steps:
- In your Slack workspace, go to ‘Home’, find the WebWhiz app under ‘Apps’, and click it. Then, click the ‘About’ tab at the top of the app’s window.
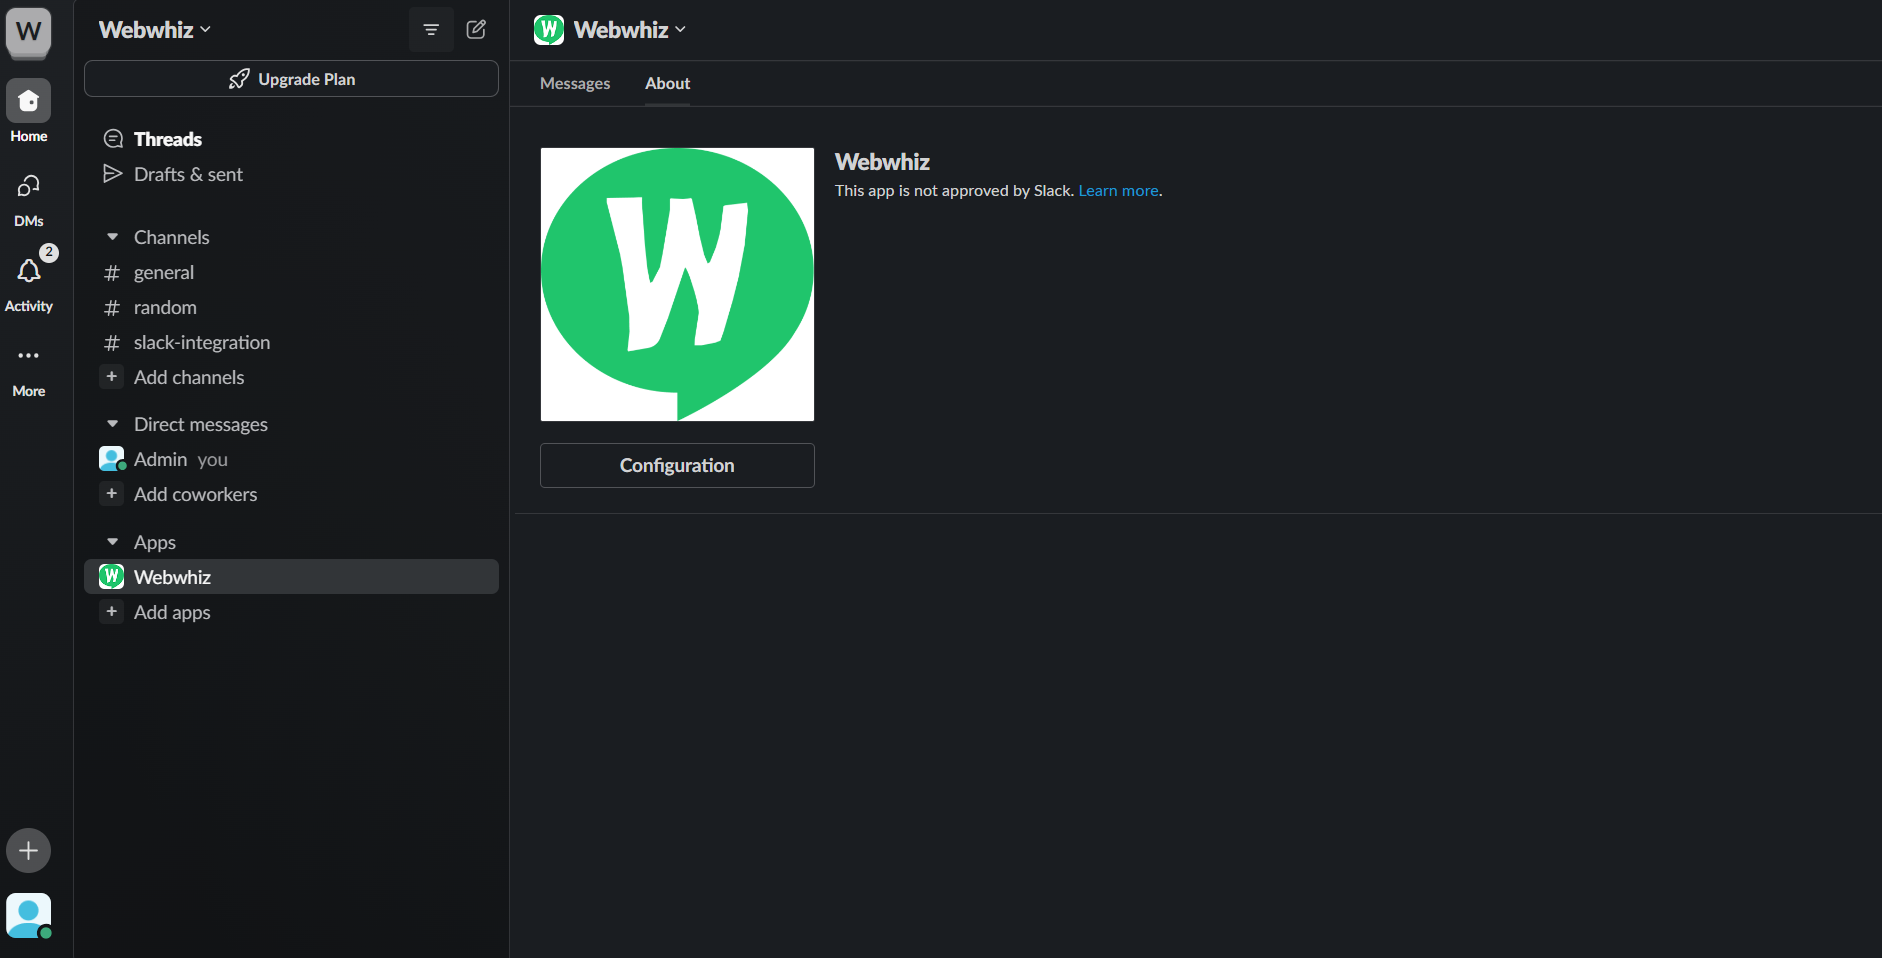
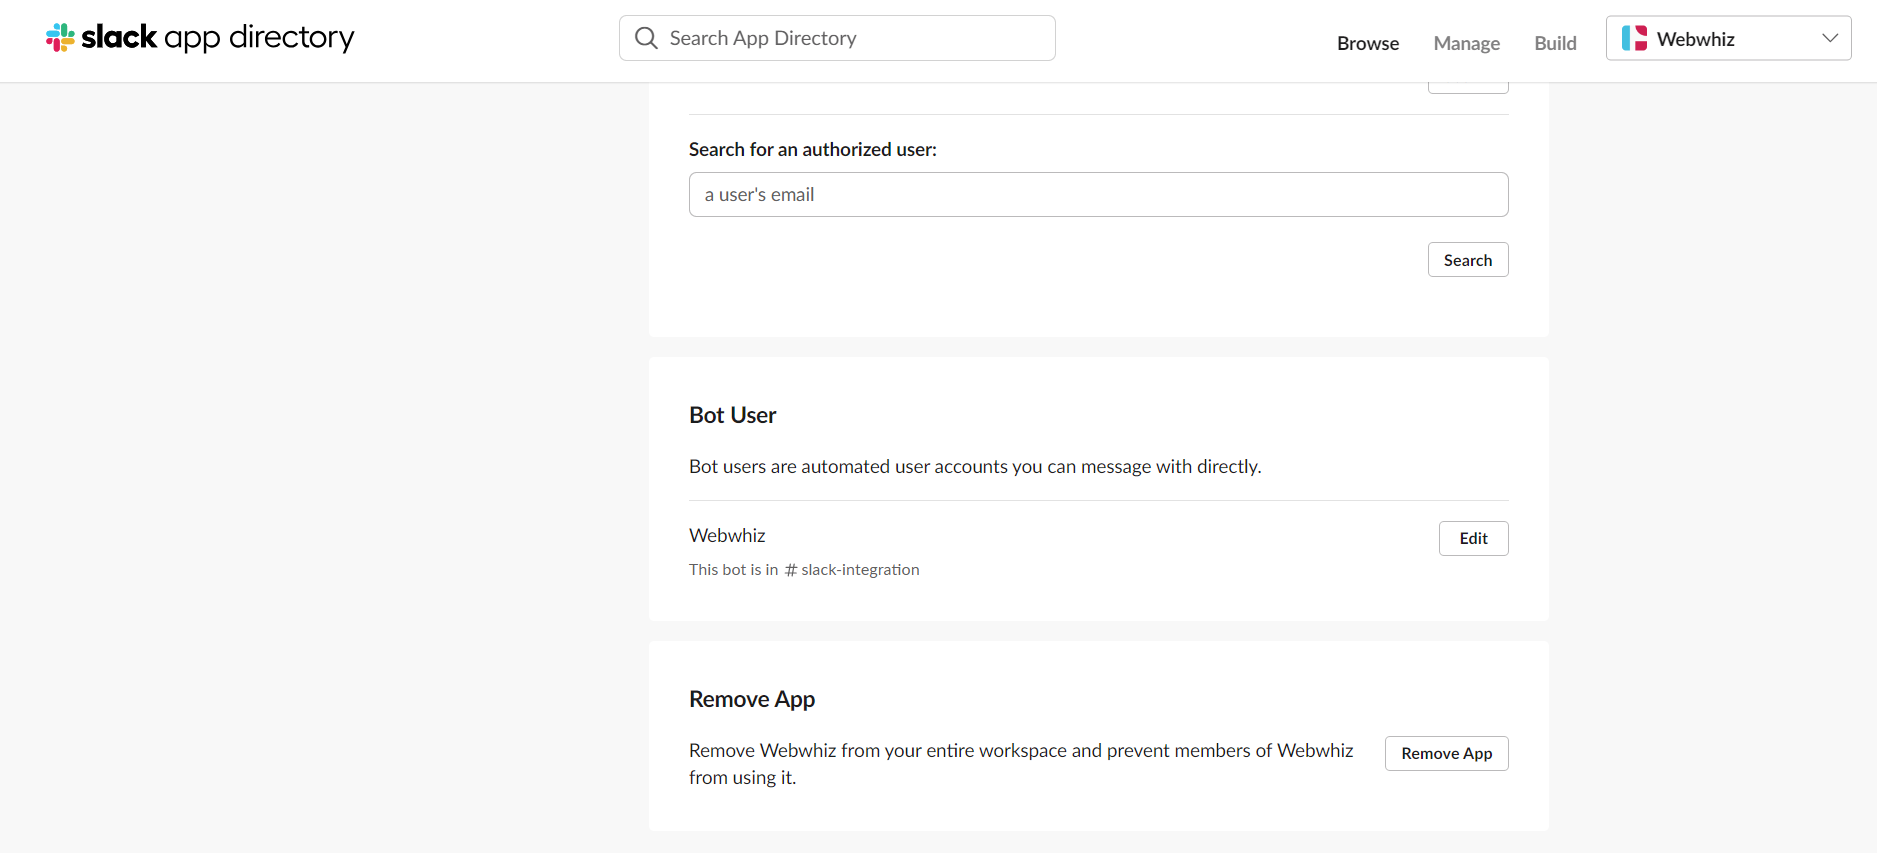
- In the ‘About’ window, you will find a ‘Configuration’ button. Click on this button.
- On the page that opens, scroll down to find and click ‘Remove App’, then confirm the removal when prompted.
By following these steps, the WebWhiz Chatbot will be successfully removed from your Slack workspace. If you decide later that you want to reintegrate the chatbot, you can go through the integration process again.
Integrating and managing the WebWhiz Chatbot within your Slack workspace can significantly enhance your team's communication and productivity. Remember, the WebWhiz team is always here to support you through each step, from integration to customization,
ensuring your experience is seamless and beneficial. We're excited to see how WebWhiz Chatbot transforms your Slack workspace into a more efficient and interactive environment.
Need help with anything? Email us at hi@webwhiz.ai We’ll get back you as soon as possible