Configuring Offline Message Settings for Your Chatbot Widget
This guide details how to set up and customize the offline message feature for your chatbot, ensuring that you can capture messages from users when live assistance is unavailable.
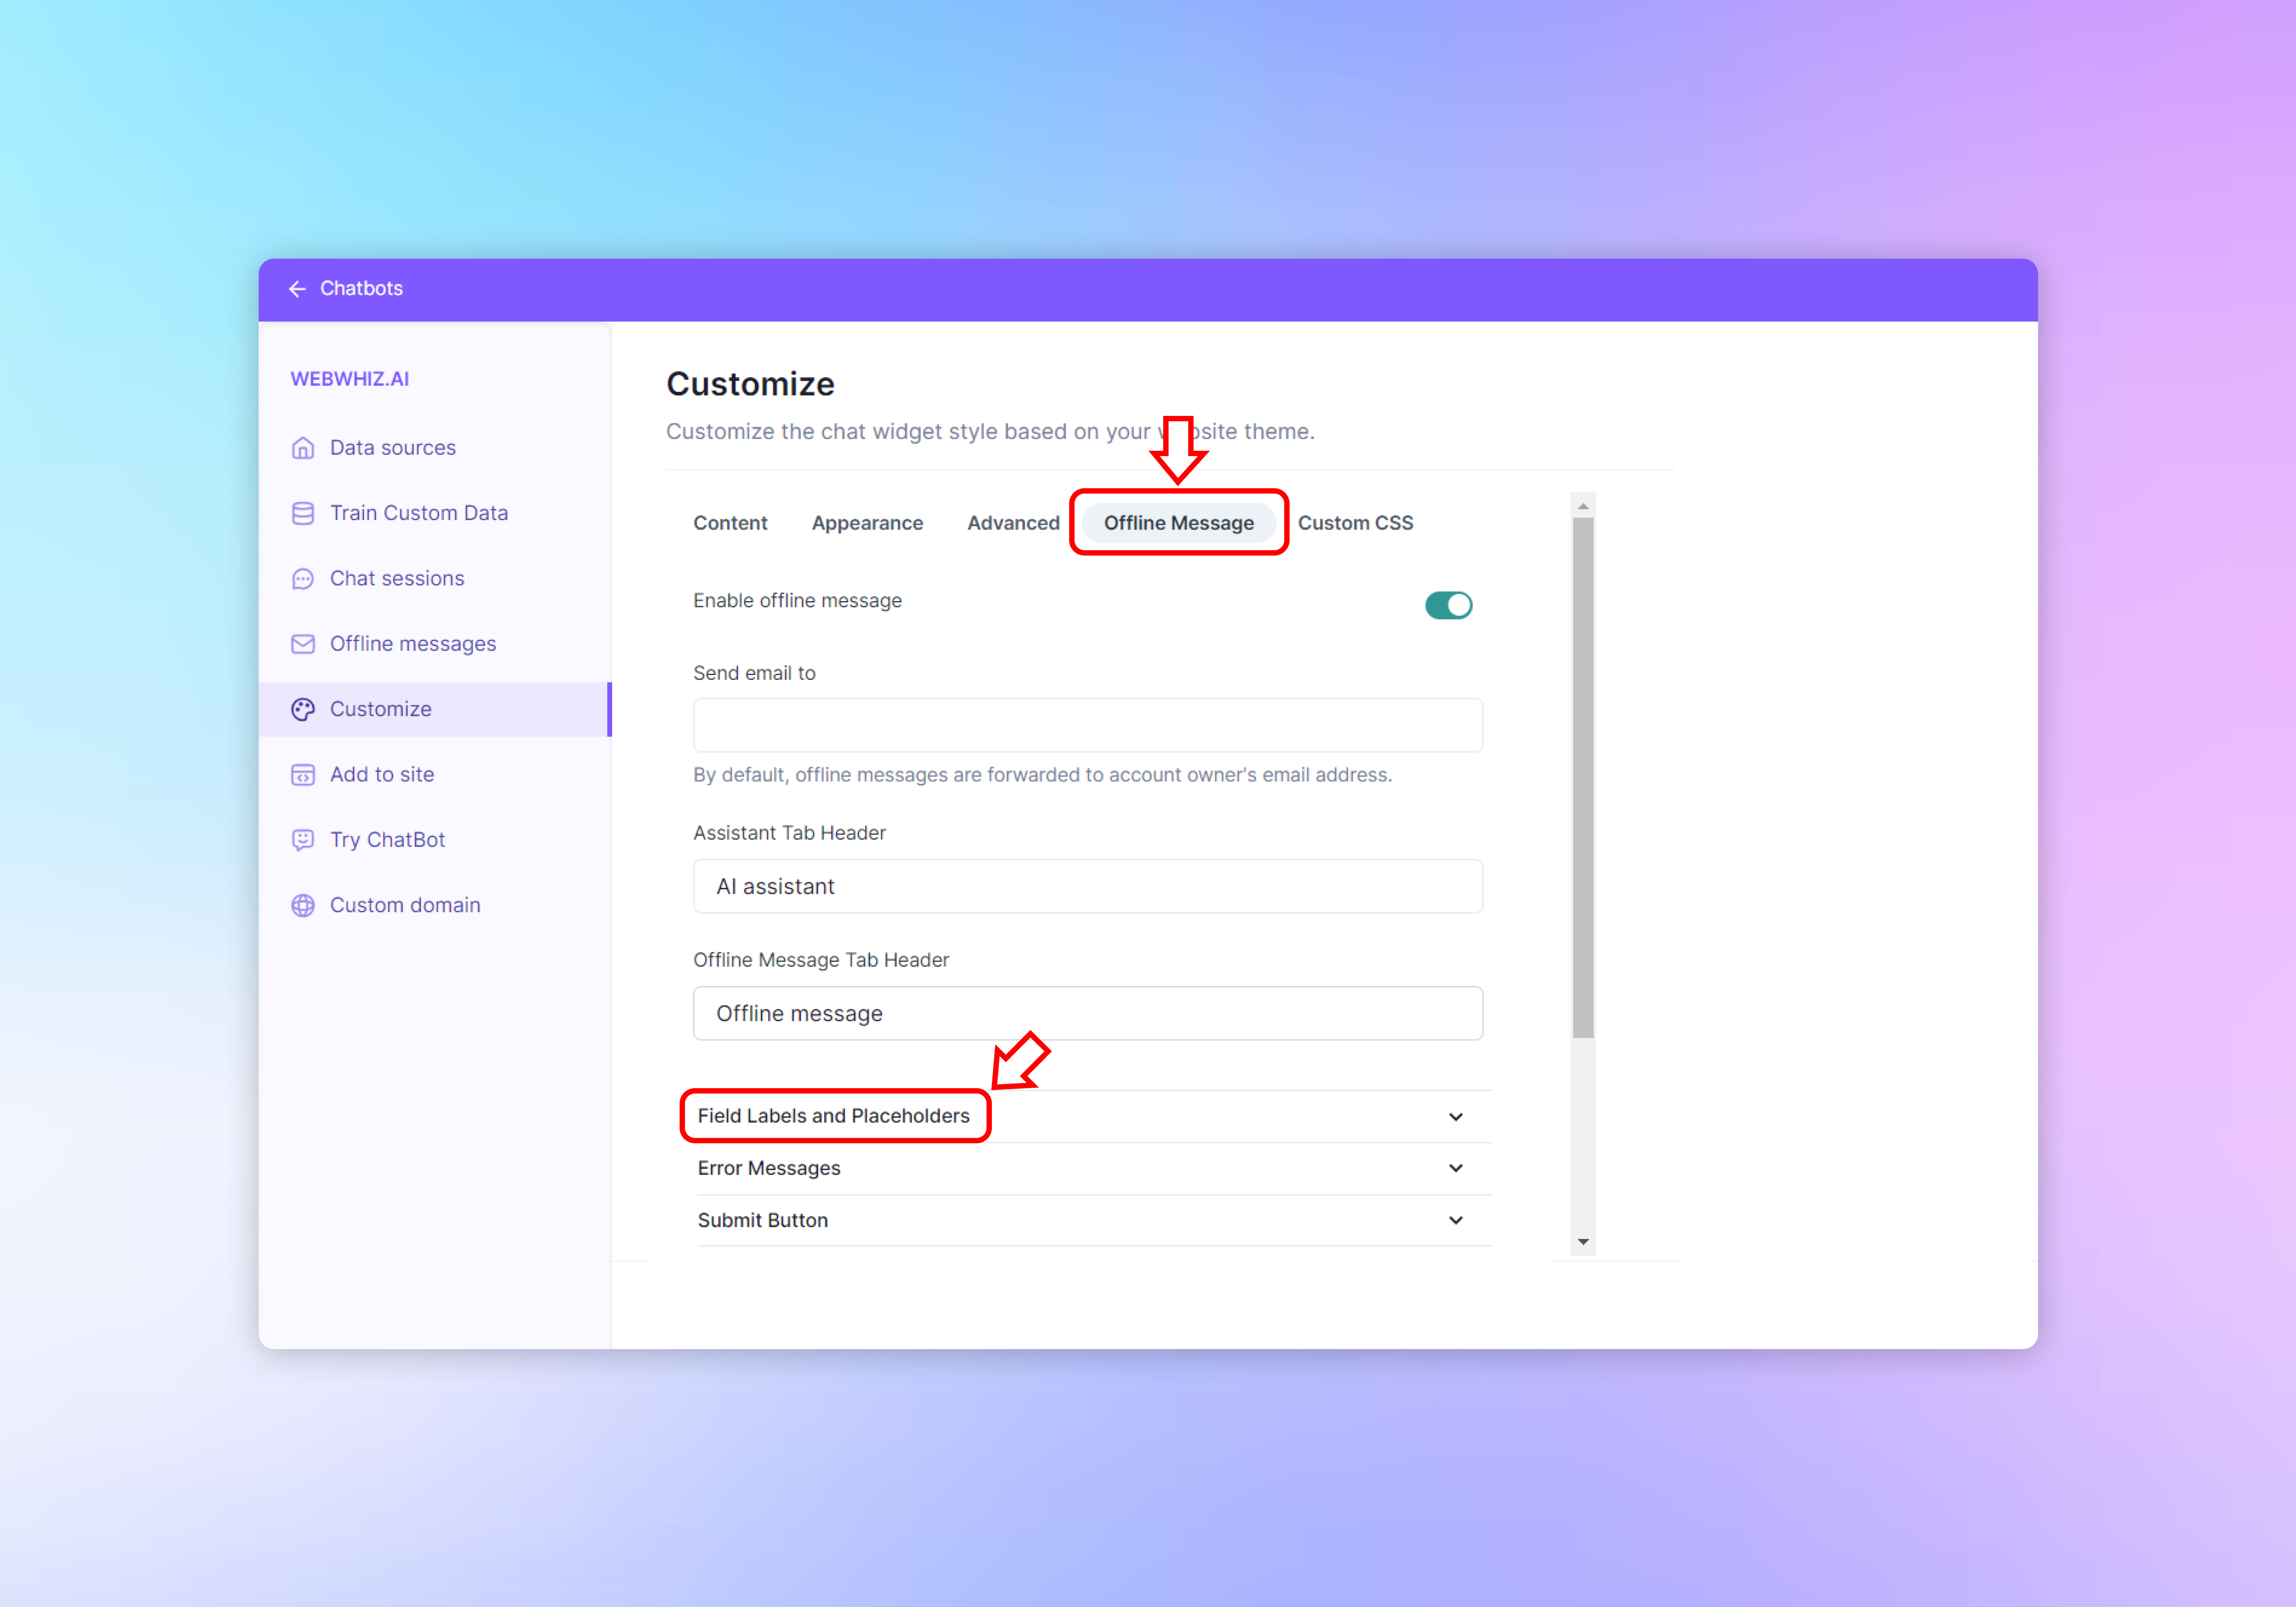
Accessing Offline Message Settings
- Log into your chatbot control panel.
- From the side navigation menu, select “Customize” to open the customization options.
- Click on the “Offline Message” tab at the top of the customization area.
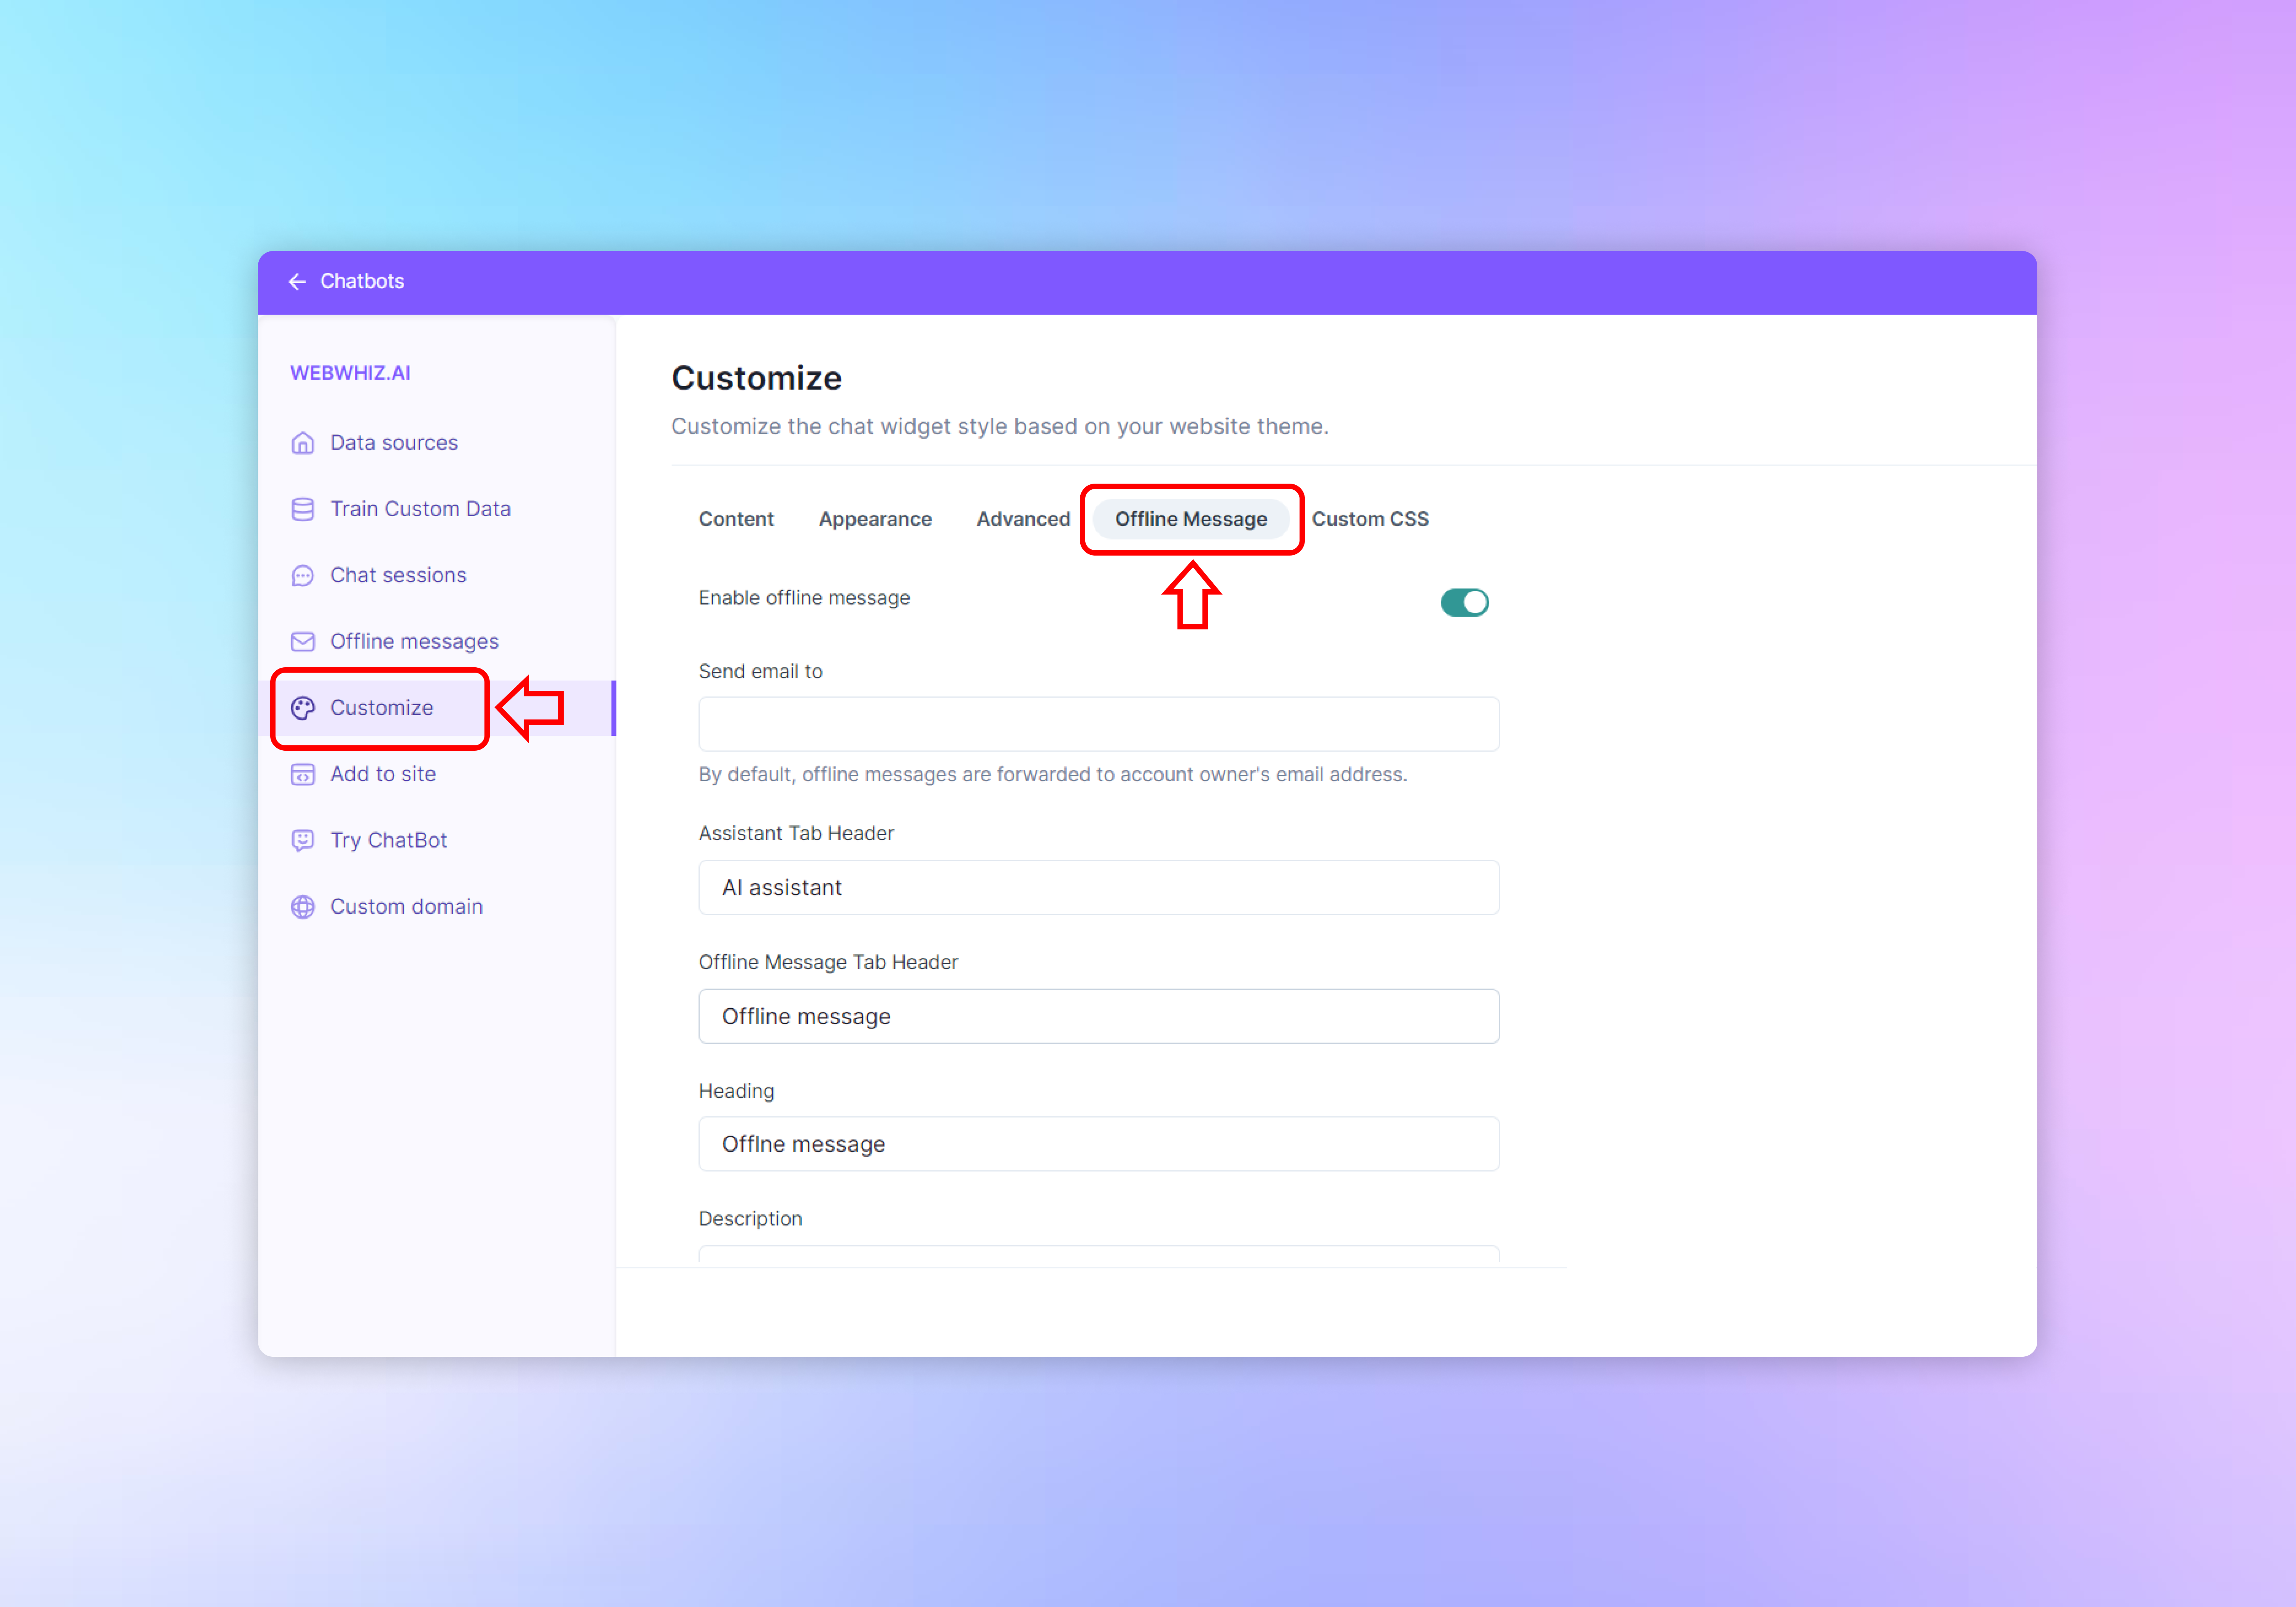
Enabling and Managing Offline Messages
Enable Offline Messages
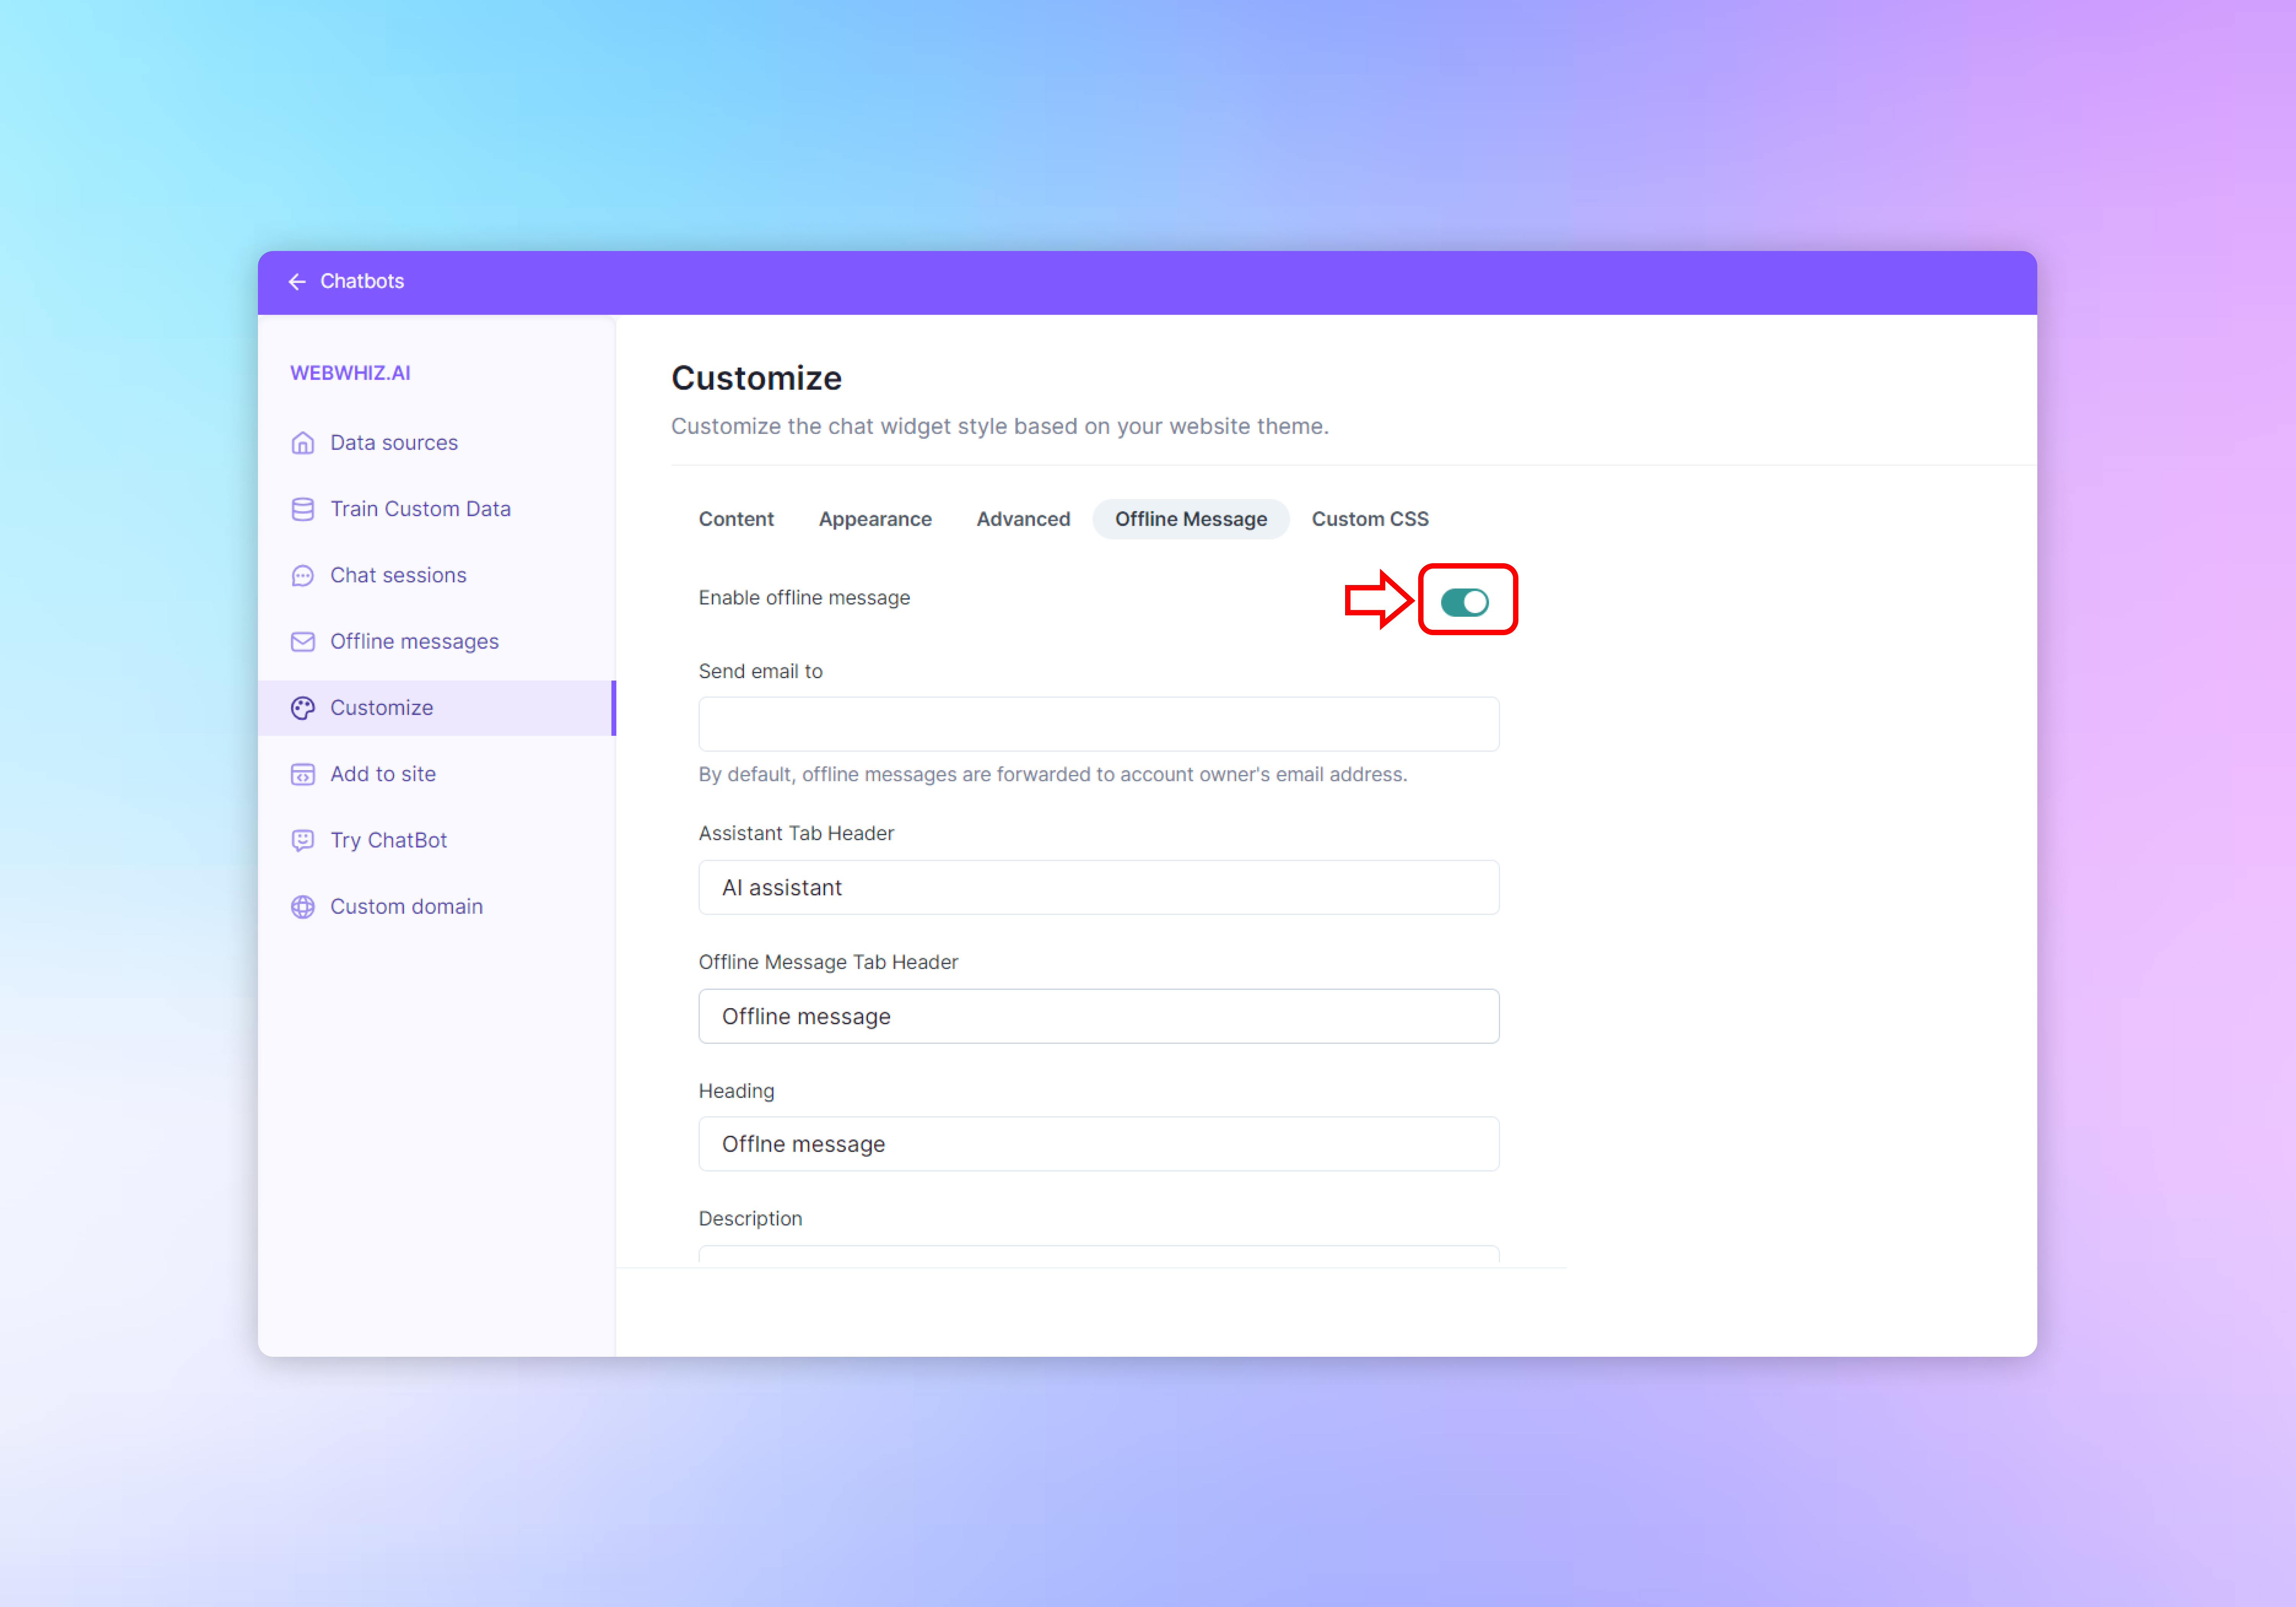
- To allow users to leave messages outside of live support hours, toggle the “Enable offline message” switch to the on position.
Email Forwarding
- Specify an email address in the “Send email to” field where you want offline messages to be sent. This ensures that you can follow up with users even when they reach out after hours.
Personalizing the User Interface
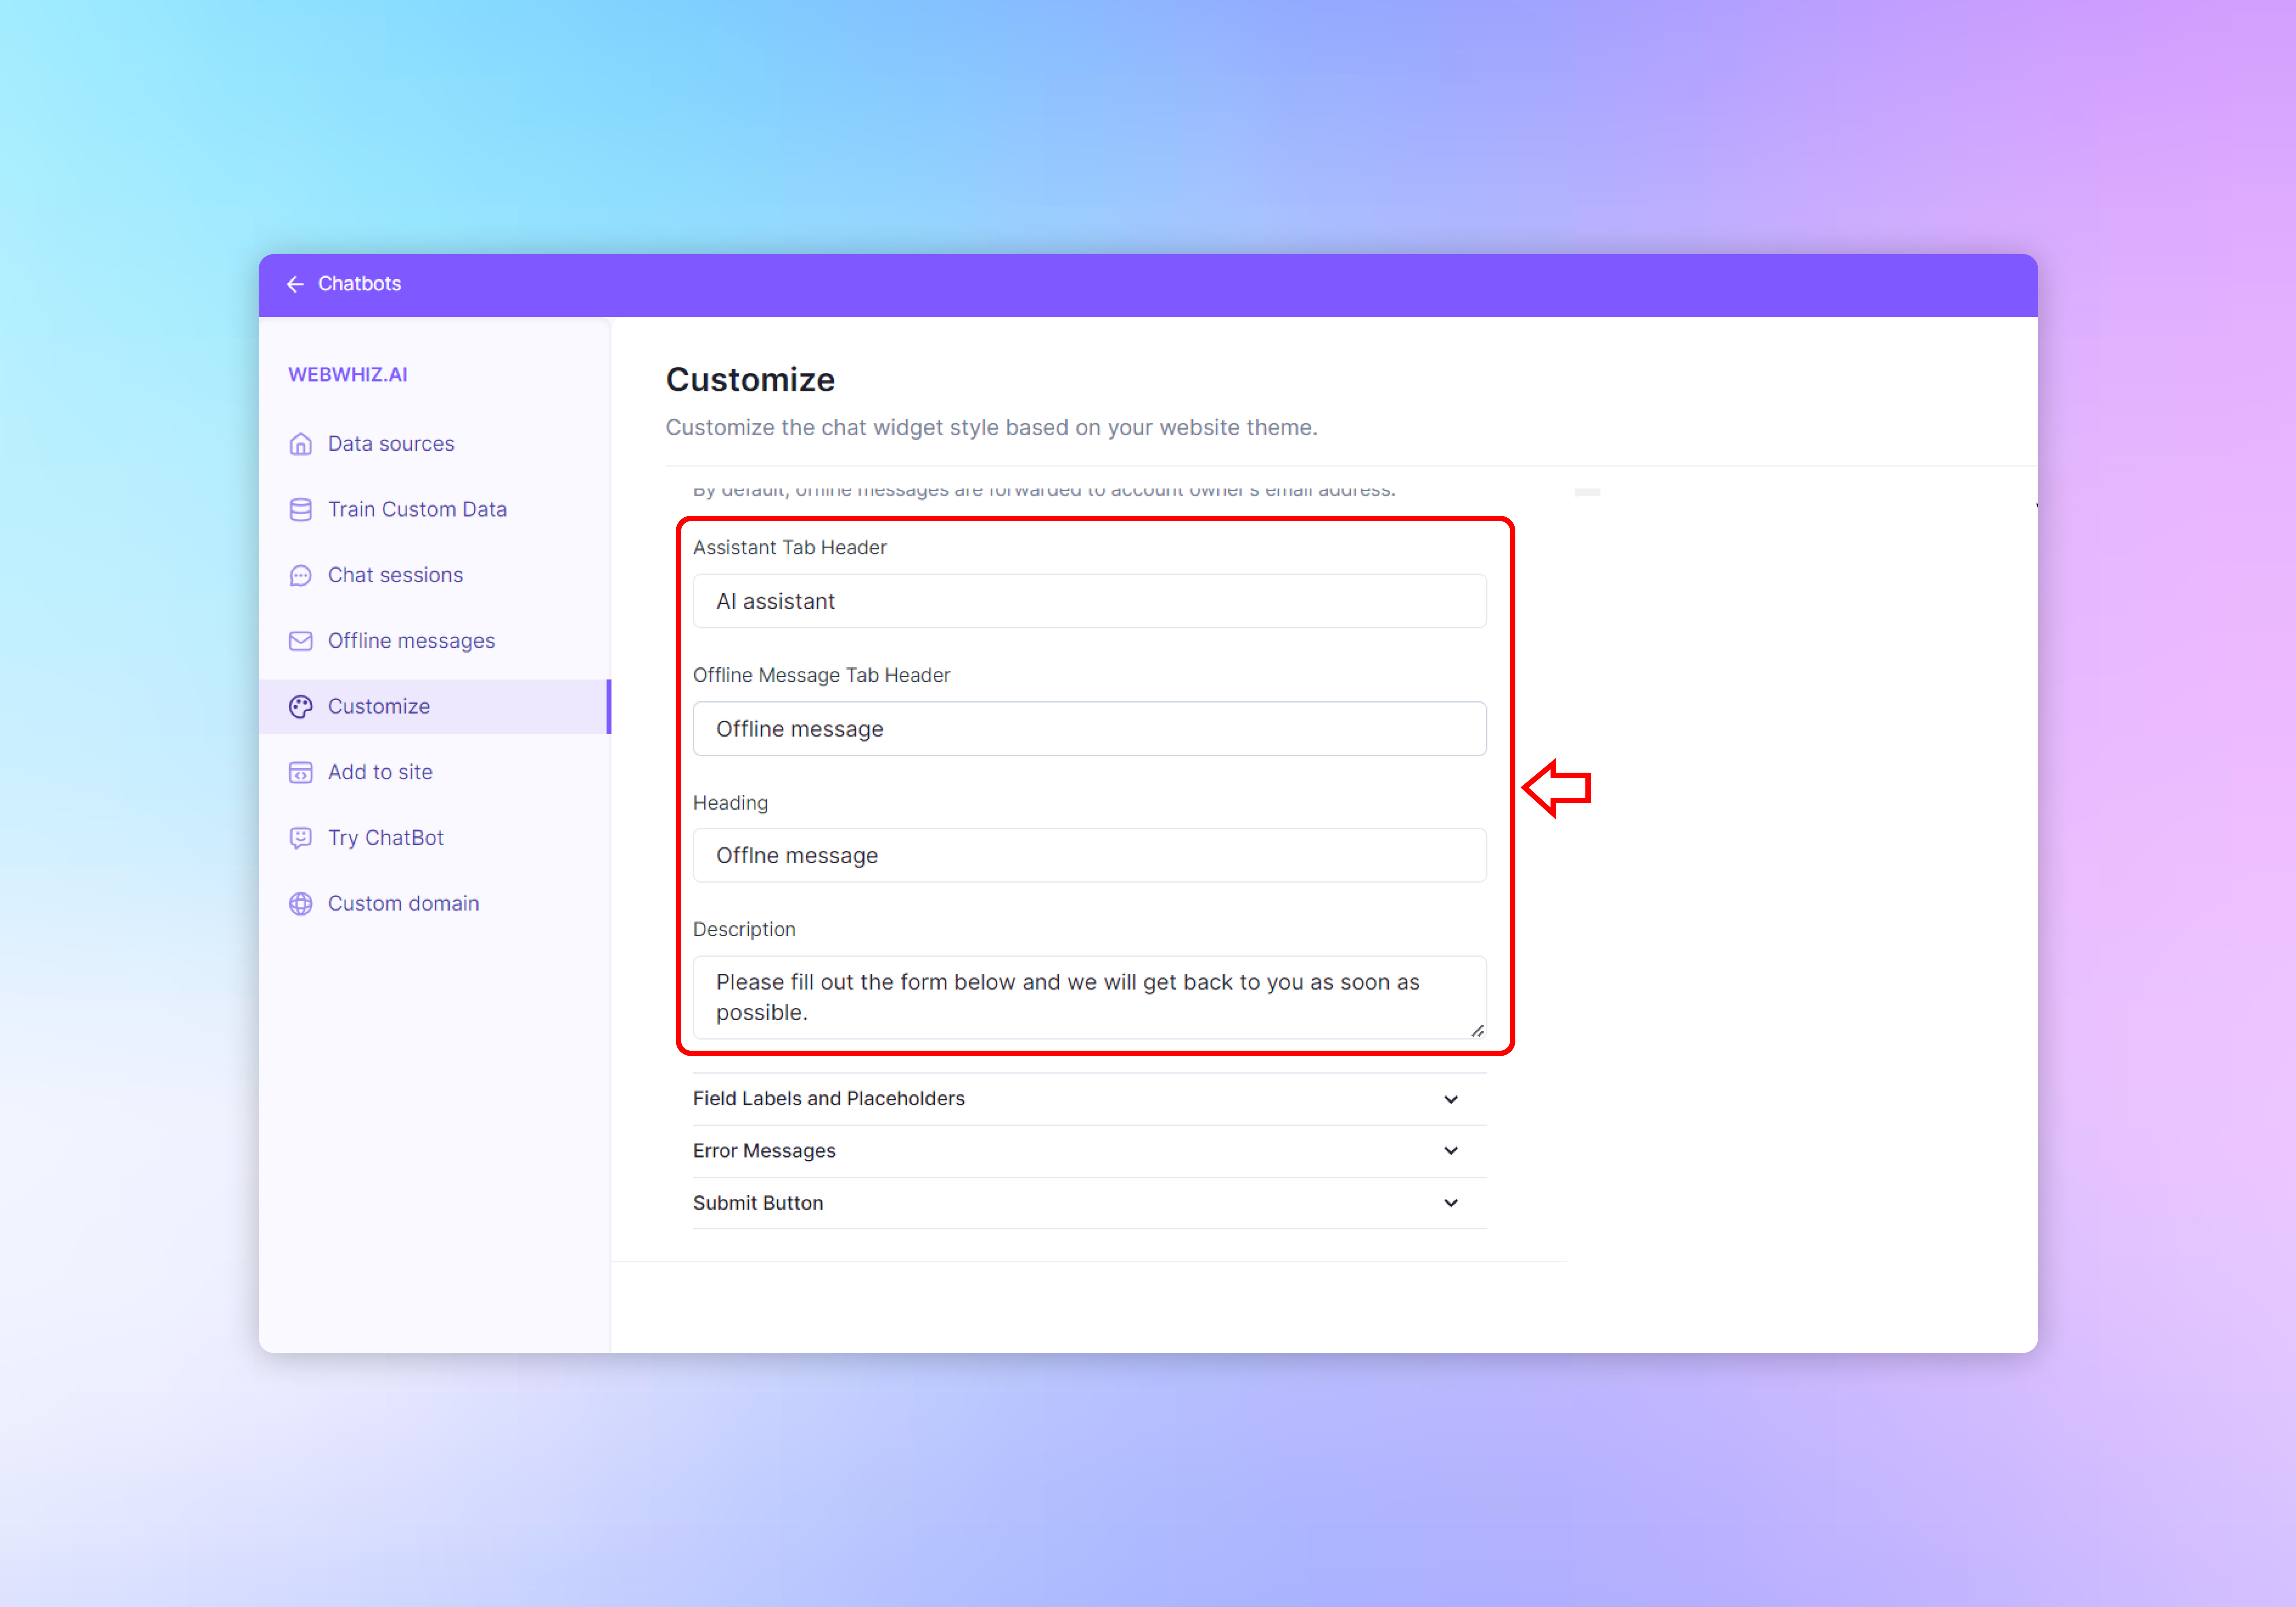
Assistant and Offline Tab Headers
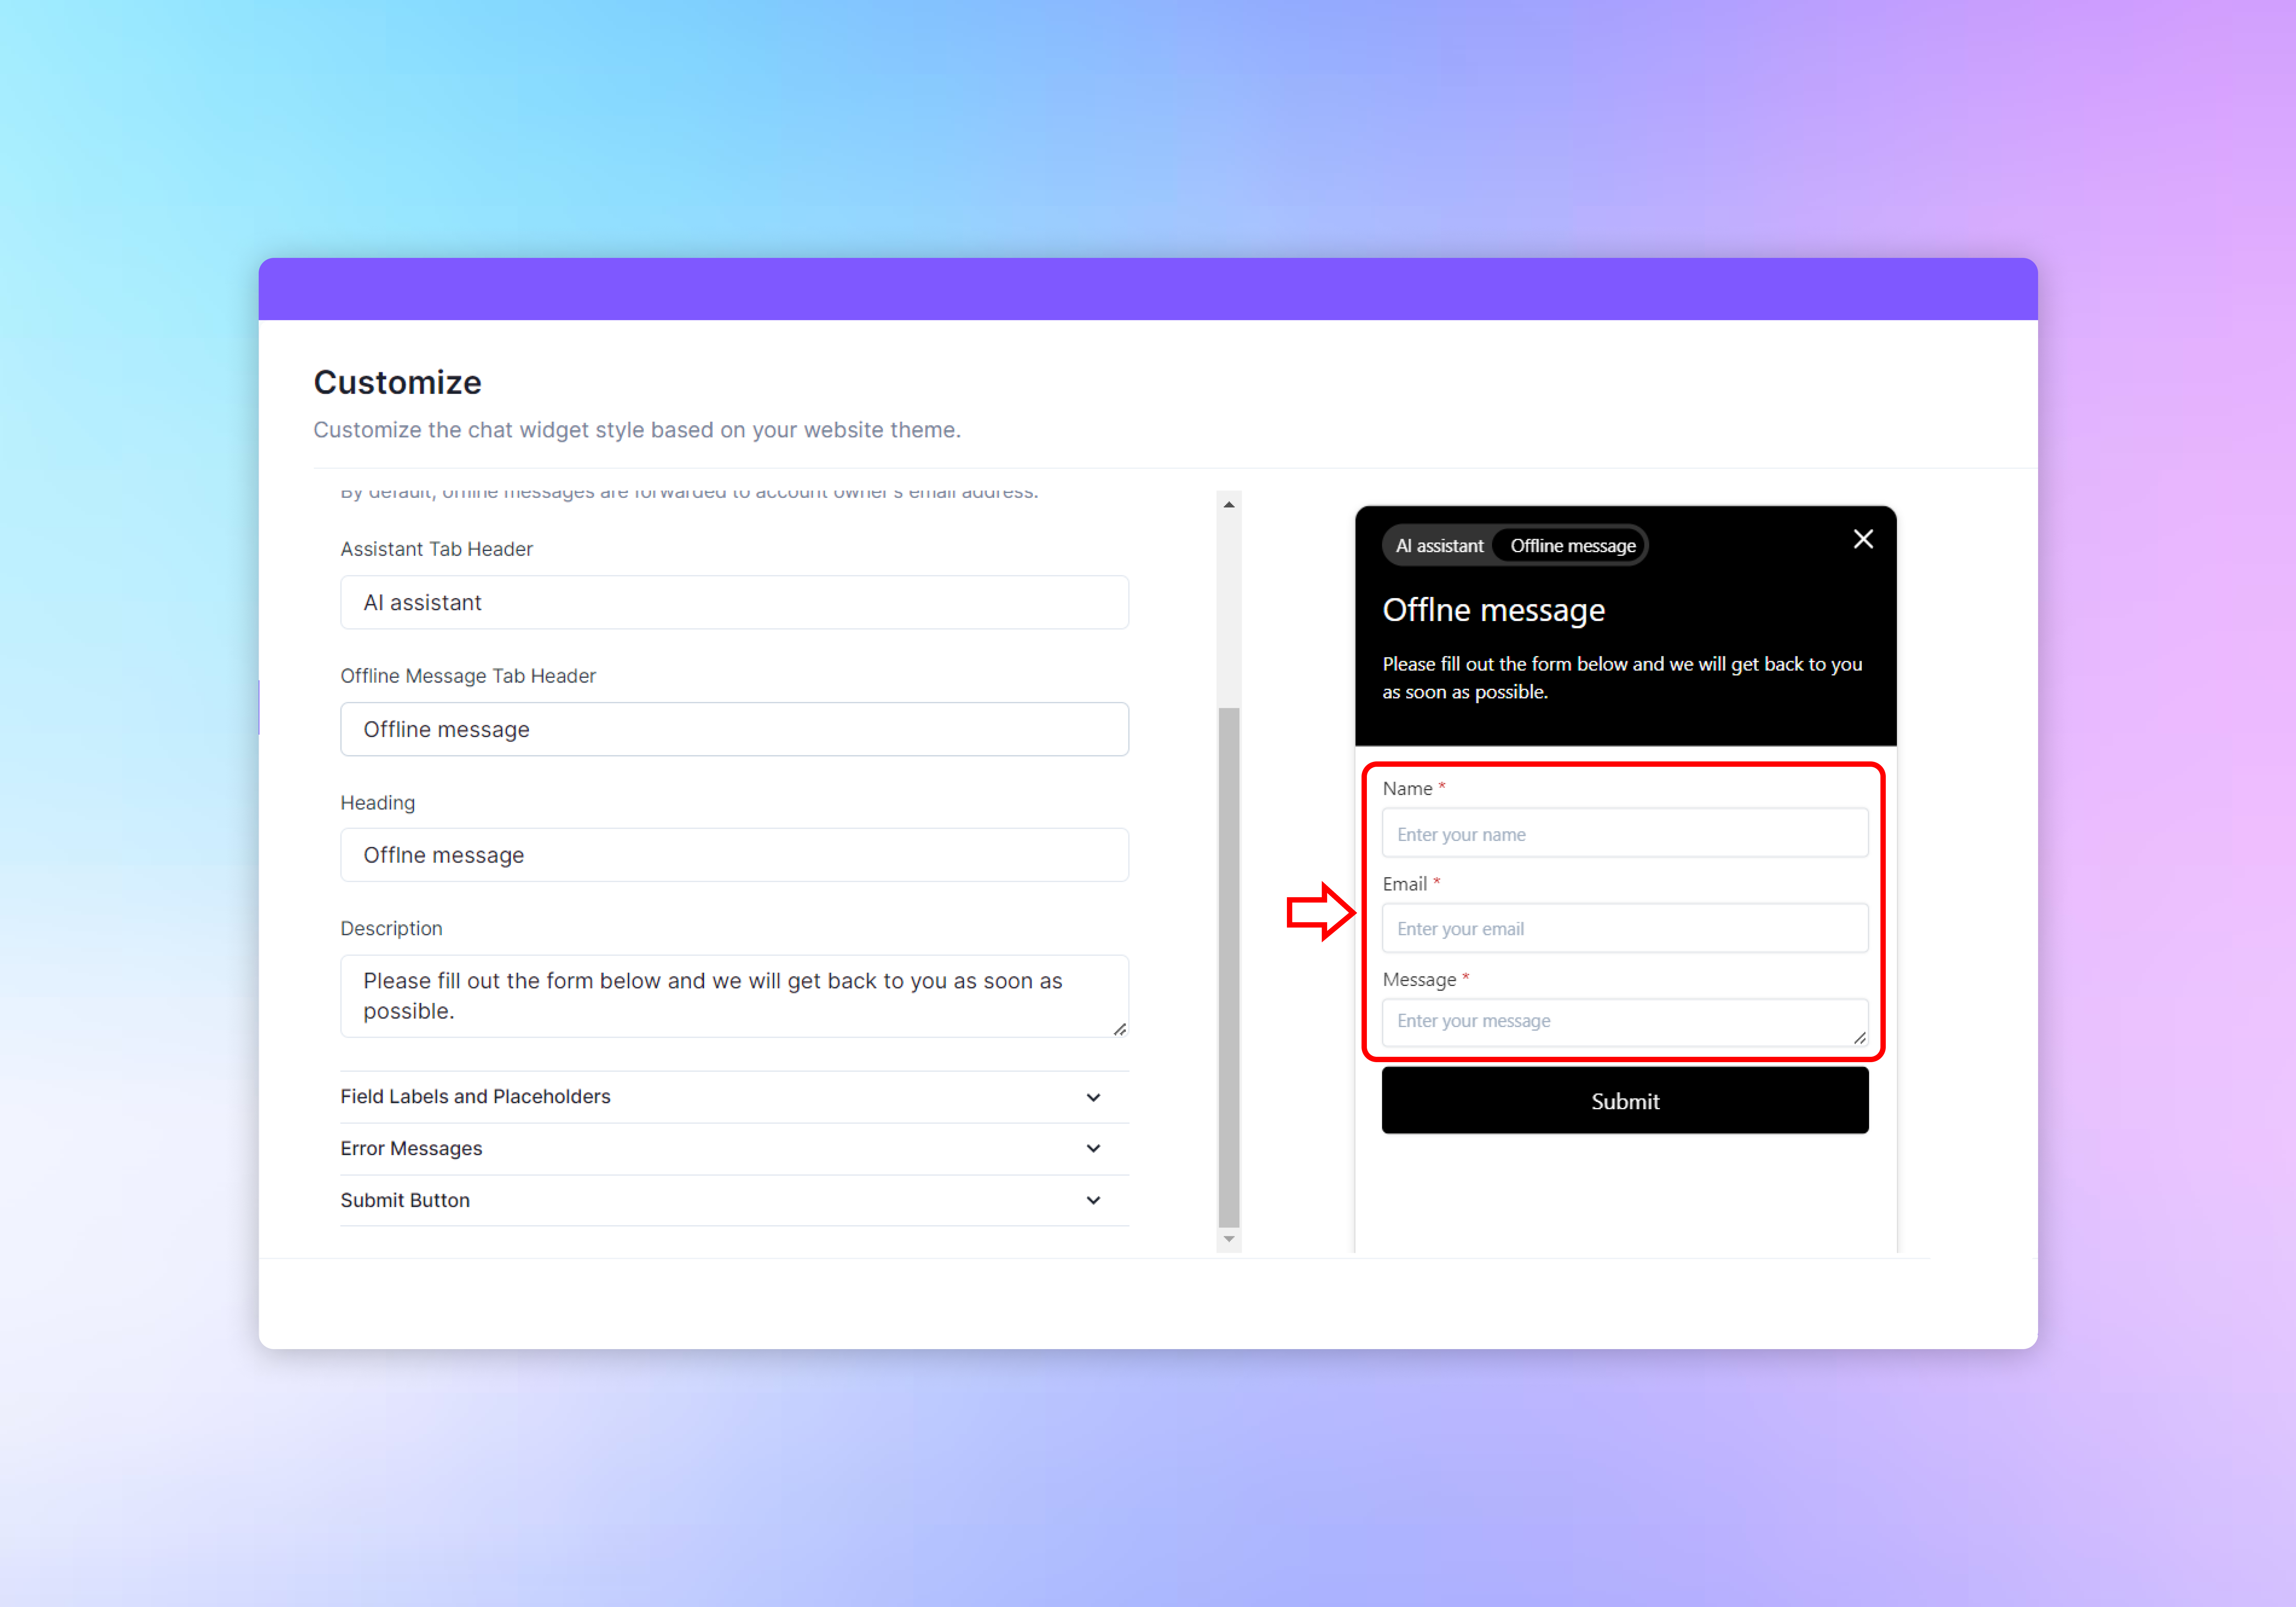
- “Assistant Tab Header” is the label for the chatbot tab when it’s active. Enter a title like “AI assistant” to indicate that the chatbot is ready to interact.
- “Offline Message Tab Header” is the label for the tab when the user is prompted to leave a message. A straightforward label like “Offline message” works well.
Heading and Description
- The “Heading” sets the title for the offline message form. Use a clear and concise title such as “Offline Message.”
- In the “Description” text area, provide instructions or a friendly message to the user, such as “Please fill out the form below, and we will get back to you as soon as possible.”
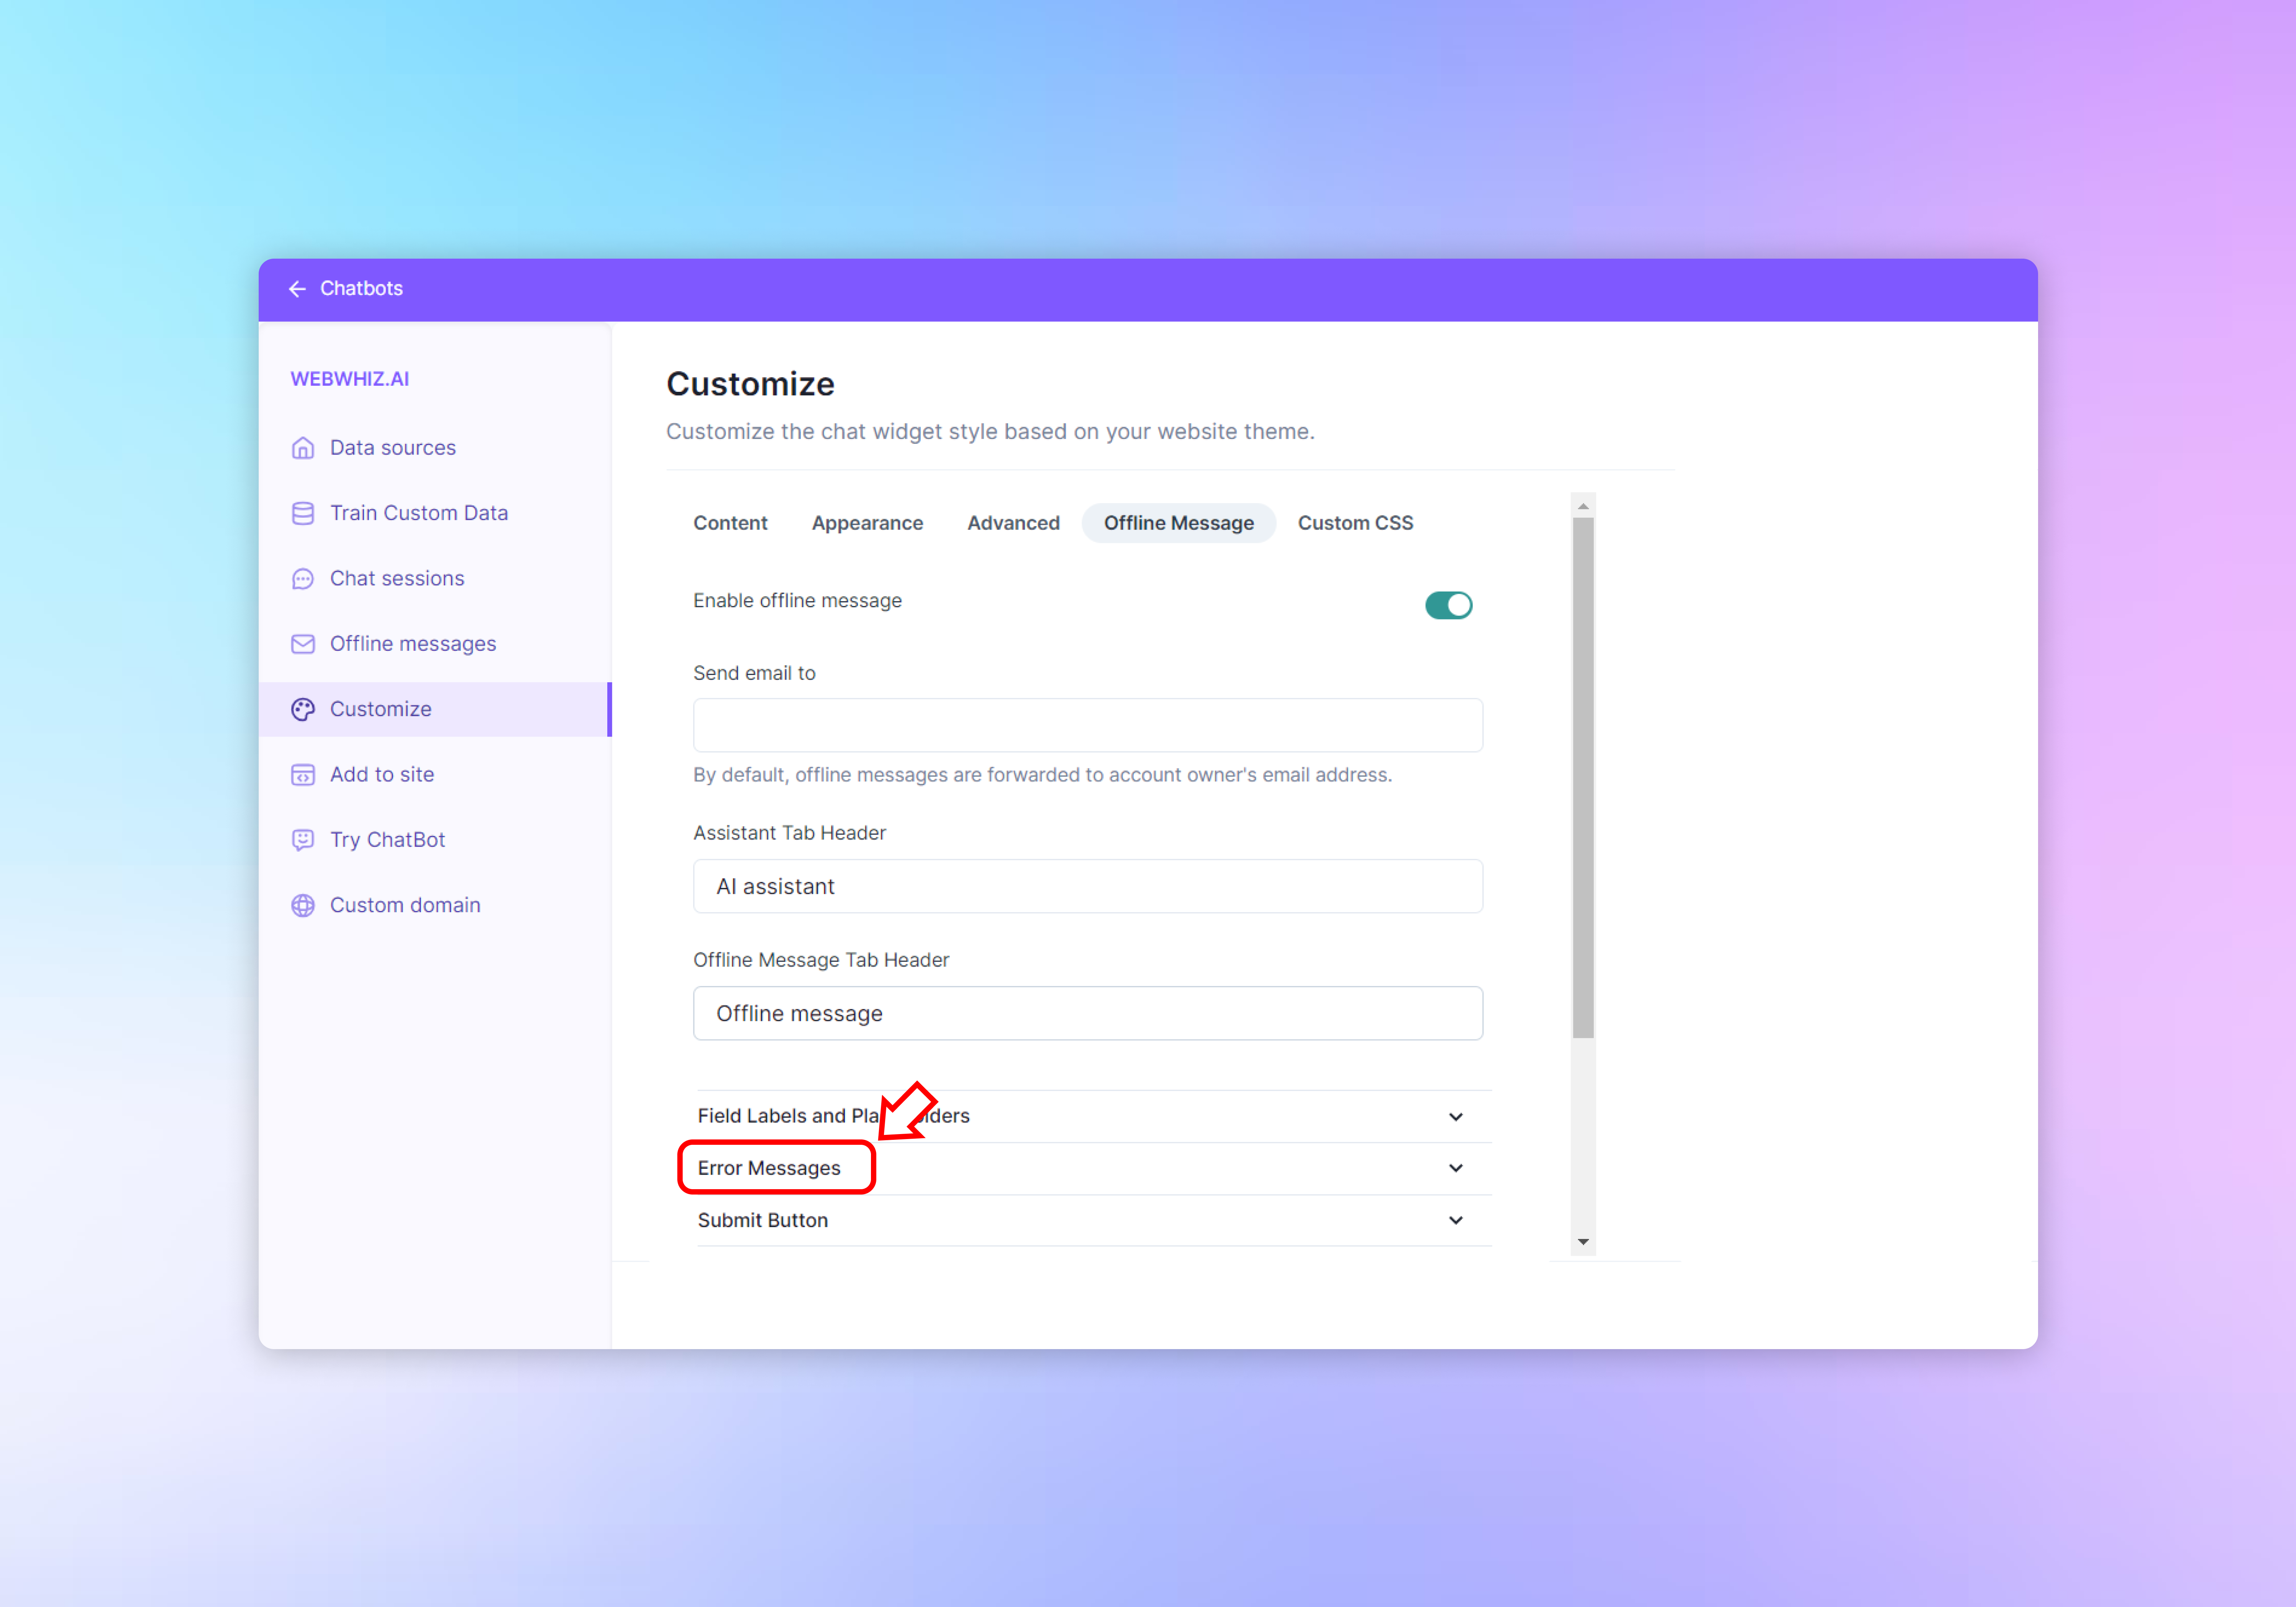
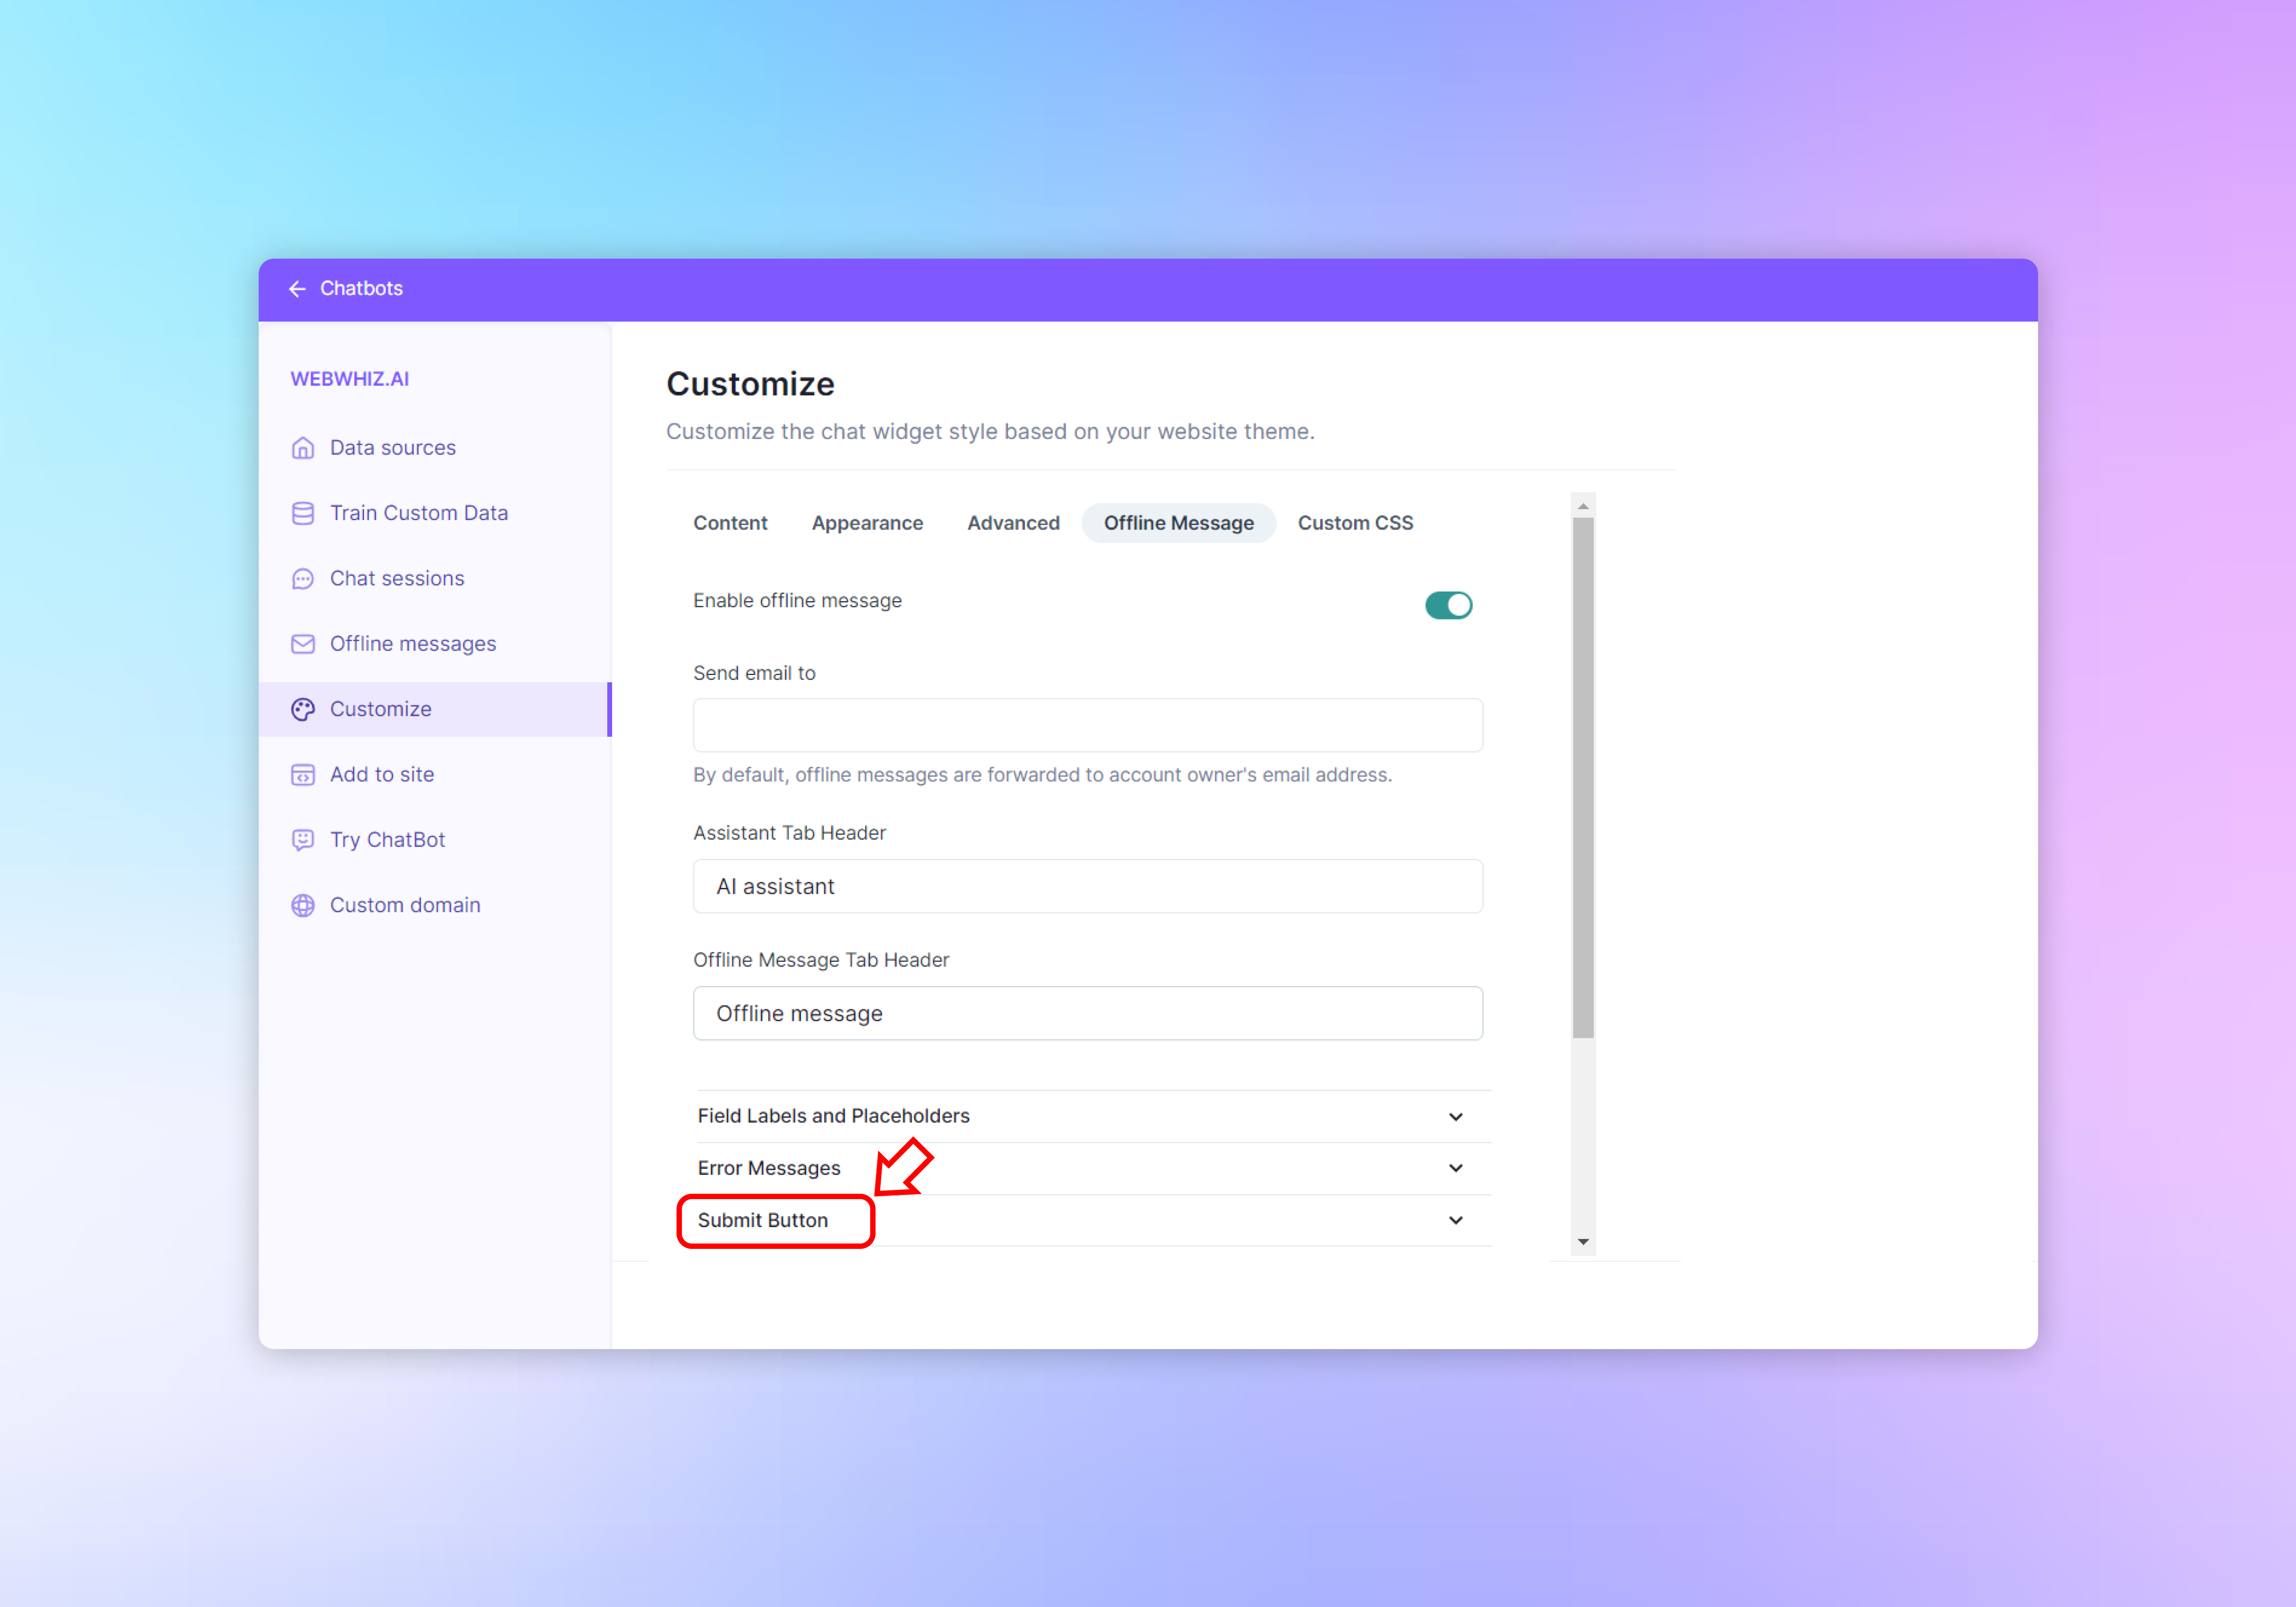
Customizing Form Elements
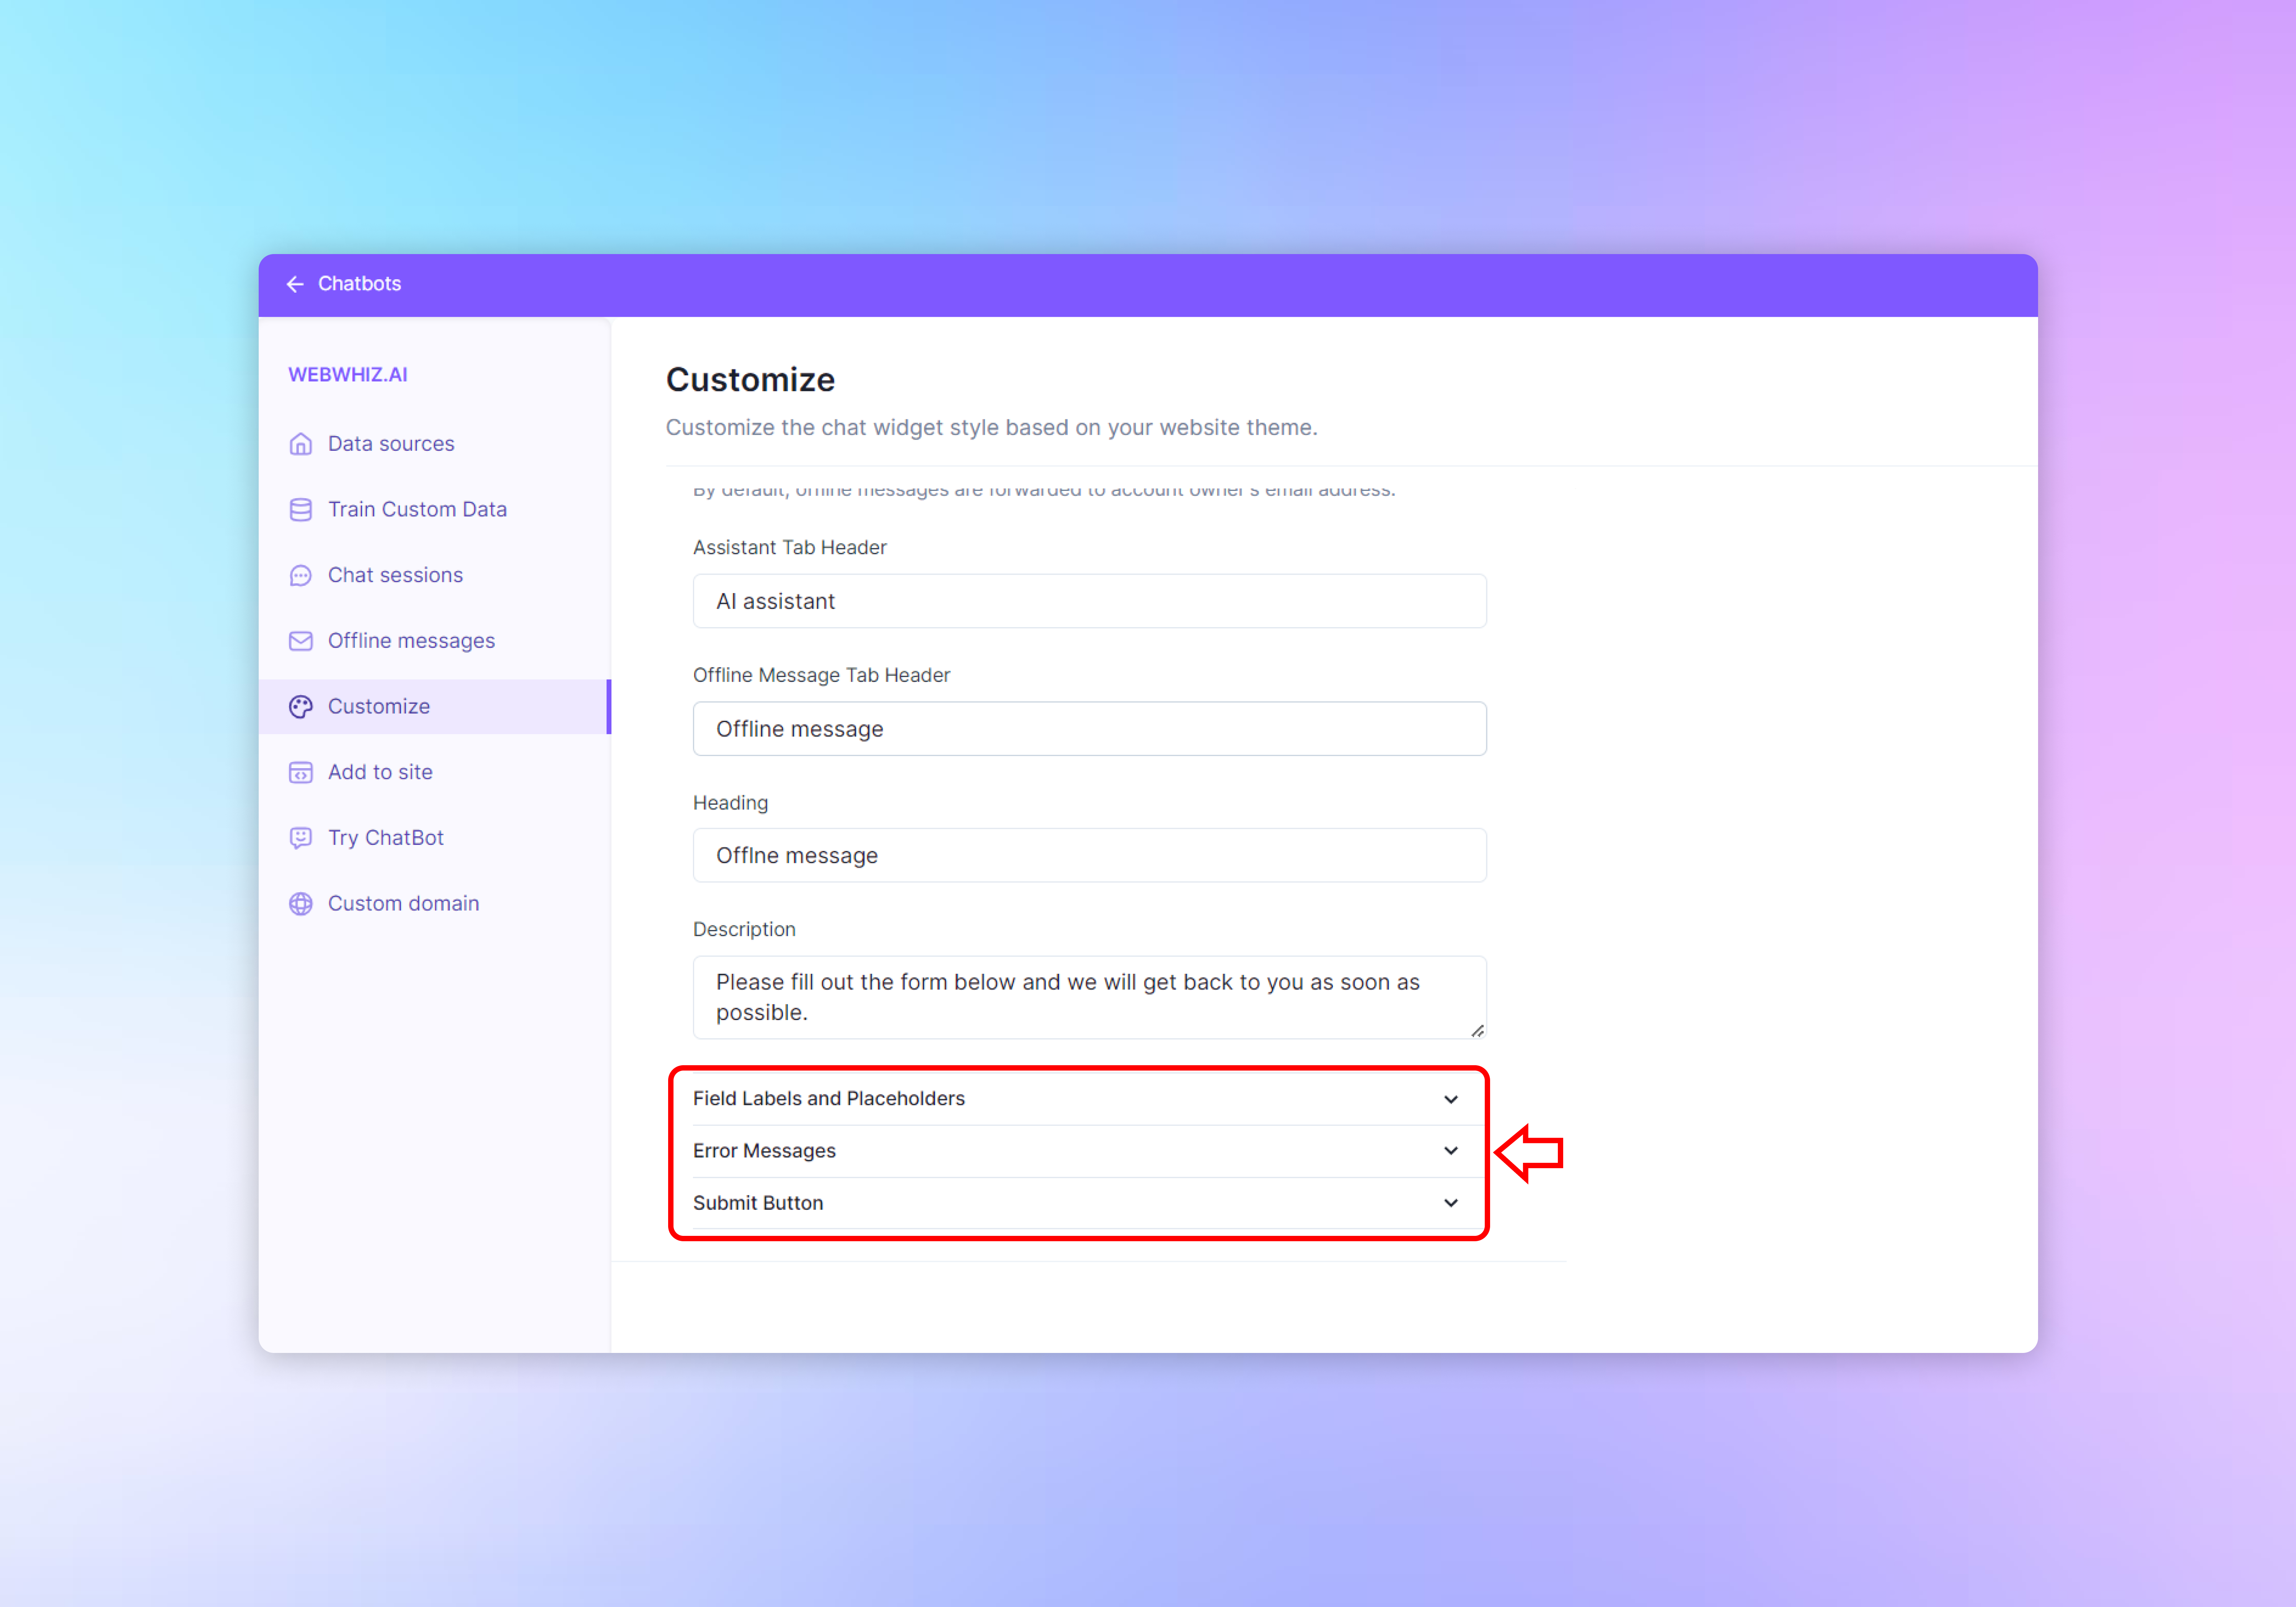
- Expand the “Field Labels and Placeholders” section to specify the text for form labels and placeholder text in input fields.
- Use the “Error Messages” section to define custom messages that will appear if the user makes an error when filling out the form.
- Customize the “Submit Button” text to prompt users to send their message, such as with the word “Submit.”
Customizing Field Labels and Placeholders

After enabling offline messages and setting up the basic headers and descriptions, you can further personalize the experience by customizing the labels and placeholders for the form fields where users will enter their information.
Accessing Field Customization
- In the “Customize” panel, locate the “Field Labels and Placeholders” section.
- Click on the dropdown arrow next to “Field Labels and Placeholders” to expand the menu.
Name Field
- “Name Field Label” is the text that will appear above the name input field on the form. Enter a label such as “Name” to indicate to users where they should type their name.
- “Name Field Placeholder” is the greyed-out text inside the name input field before the user begins typing. Use a prompt like “Enter your name” to guide users on what to input.
Email Field
- “Email Field Label” is the text that will appear above the email input field. Type a label such as “Email” to instruct users to provide their email address.
- “Email Field Placeholder” is the text inside the email input field that suggests what to enter. A placeholder such as “Enter your email” works effectively.
Message Field
- “Message Field Label” is the text for the label above the message input field. Input a label like “Message” to show users where to type their message or inquiry.
- “Message Field Placeholder” is the text inside the message input field that prompts users to begin typing their message. A placeholder such as “Enter your message” encourages them to share their query or feedback.
Accessing Error Message Customization
- Navigate to the chatbot customization panel within your dashboard.
- Locate the “Error Messages” section and click the dropdown arrow to expand it.
Customizing Error Messages
Error messages are critical for informing users about mistakes made during form completion. They should be clear and concise, guiding the user to correct the error without causing confusion or frustration.
Field Required Message
- The “Field Required Message” appears when a user tries to submit the form without filling in all mandatory fields.
- Enter a message in the provided field that prompts the user to complete the required information. For example: “This field is required.”
- Ensure the message is polite and friendly, encouraging users to complete the form.
Invalid Email Message
- The “Invalid Email Message” is displayed when the email address entered does not meet the standard email format.
- In the corresponding field, type a message that instructs the user on the issue and how to fix it. For instance: “Please enter a valid email.”
- The message should be straightforward, helping users understand that they need to provide a correctly formatted email address.
Reviewing Error Messages
- Review the error messages to ensure they are easy to understand and provide clear instructions on how to rectify the issue.
- Keep the language consistent with your brand’s tone and consider the user’s perspective—error messages should be helpful, not discouraging.
Accessing Submit Button Settings
- Within your chatbot’s customization panel, locate the “Submit Button” section.
- Click on the dropdown arrow to expand this section and view the customizable fields.
Submit Button Label
- The “Submit Button Label” is the text that will appear on the button users click to submit the form. Enter a concise command like “Submit” that prompts action.
Submitting Text
- “Submitting Text” is displayed to users after they click the submit button, indicating that the form is being processed. Use a phrase like “Submitting…” to inform users that their submission is in progress.
Form Submit Success Message
- The “Form Submit Success Message” confirms that the user’s message has been sent successfully. Craft a positive and reassuring message like “Your message sent successfully!”
Form Submit Error Message
- The “Form Submit Error Message” informs users if there was an issue with their submission. A simple message such as “Oops! Something went wrong” alerts users to a problem without causing alarm.
Send Again Button Label
- If the form allows users to send another message, the “Send Again Button Label” will reset the form for a new submission. Label it with a clear action phrase like “Send again.”
Try Again Button Label
- In the event of an error, the “Try Again Button Label” gives users the option to resubmit the form. Use an encouraging phrase such as “Try again” to motivate users to reattempt submission.
Reviewing and Saving Your Customizations
- Review all entered text to ensure clarity and that it aligns with the tone of your brand.
- Consider the user experience—each message should guide the user smoothly through the process of submitting the form and understanding the outcome.
Previewing Your Configuration
- The live preview window on the right side of the screen updates in real-time to reflect the changes you make. Use this to ensure the offline message form is intuitive and matches your brand before saving.
Applying Your Changes
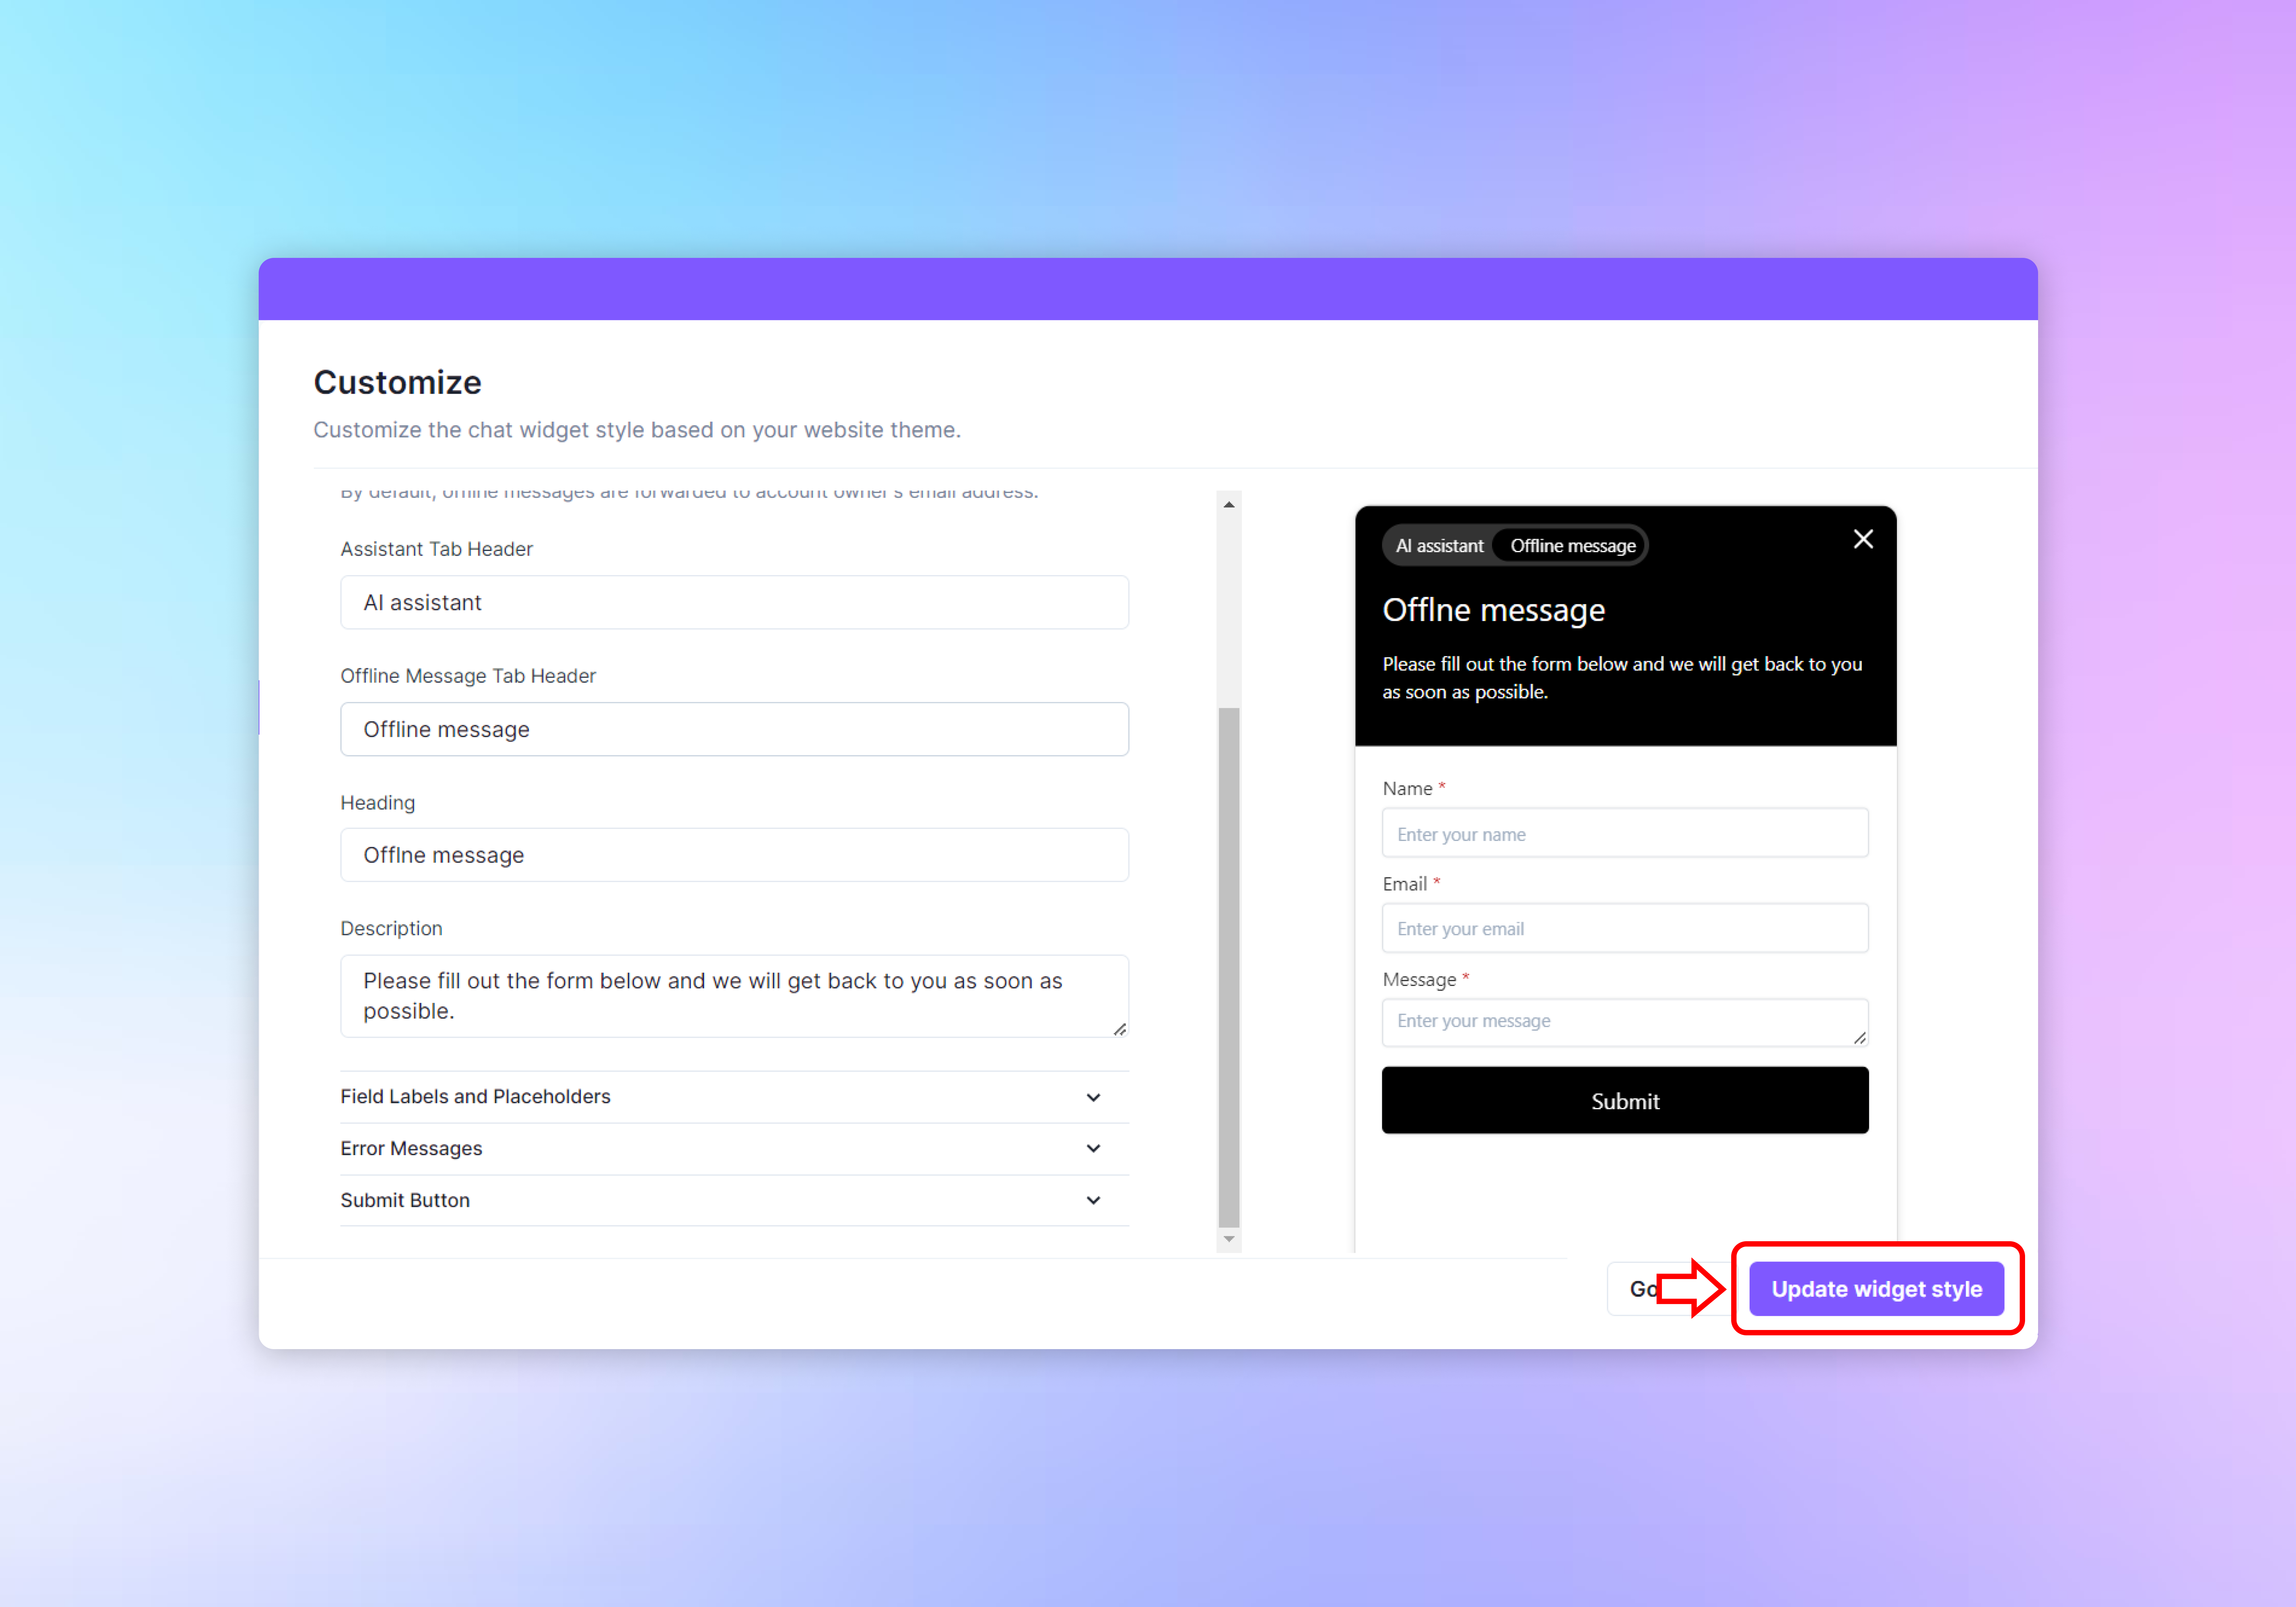
- Once you have configured the offline message settings to your satisfaction, click the “Update widget style” button at the bottom right to save and apply these settings to your chatbot widget.
- If you decide not to save the changes, you can return to the previous page by clicking the “Go back” button at the bottom left.
Need help with anything? Email us at hi@webwhiz.ai We’ll get back you as soon as possible